
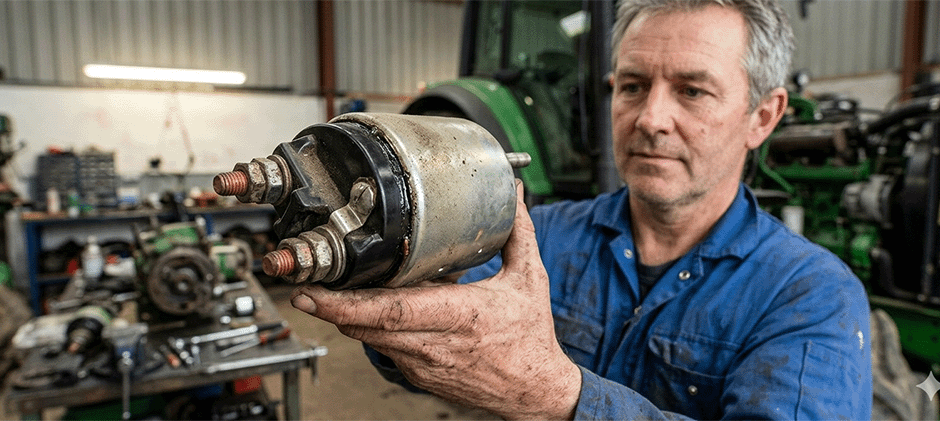
A starter solenoid is a crucial switch to engage the starter motor and get your engine to crank and run smoothly. If a starter solenoid fails, your machinery may show symptoms such as clicking noises when trying to start, failure to crank, or difficulty starting the engine. In this guide, you’ll learn how to test a starter solenoid yourself.

What Is A Starter Solenoid and How Does It Work?
A starter solenoid is a switch that connects the ignition switch to the starter motor. Its main function is to engage the starter motor when the ignition key is turned to the “start” position, allowing the engine to crank. It helps reduce wear and tear on the system by ensuring the high current to operate the starter motor is safely controlled and the starter motor is engaged or disengaged clearly. If the starter solenoid fails, the equipment may suffer from unexpected symptoms.
5 Signs of A Bad Starter Solenoid
Your equipment will tell you something is wrong if your starter solenoid dies. Watch for these early signs of a bad starter solenoid to avoid getting stuck with a dead machine.
- Engine won’t crank at all
- A single loud click when you try to restart
- The starter motor whirs but the engine won’t turn
- Intermittent starting issues
- Slow engine cranking
When you run into these bad starter solenoid symptoms, it is important to promptly check the working condition of the starter solenoid and replace it when necessary.
How to Test A Starter Solenoid?
If you are not sure what causes a bad starter solenoid, you can do a test on it. Here’s a complete guide on how to test your starter solenoid.
Safety First
- Ensure your equipment is off and the keys are removed
- Disconnect the negative battery terminals to avoid any electrical shocks or short circuits
- Wait a few minutes for the electrical system to discharge
Tools Needed
- A multimeter
- A wire brush
- A wrench set
- Screwdriver if necessary
Steps to Test the Starter Solenoid
- Locate the starter solenoid: You can find the starter solenoid on the starter motor at the bottom of the engine near the transmission
- Clean the terminals: Use a wire brush to clean both battery terminals and solenoid terminals to ensure good contact for testing
- Inspect the solenoid power supply: This involves setting your multimeter to measure DC voltage, turning the ignition key to the “Start” position, testing for battery voltage at the small wire on the solenoid (12 volts or more) and checking the wiring, ignition switch and neutral safety switch if there is no voltage.
- Test the solenoid’s operation: This includes setting the multimeter to measure resistance, disconnecting the small wire from the solenoid, testing the resistance across the two large terminals on the solenoid(typically lower than 1ohm), and confirming it is faulty if the resistance is infinite.
- Check the solenoid’s switching function: Connect one lead of the multimeter to the small terminal and the other lead to the large terminal where the battery is connected with the small wire disconnected. Then, have an assistant turn the ignition key to the “Start” position, so you can hear a click and see a change in resistance on your multimeter. If there’s no change, the solenoid may be faulty.
- Test the starter motor: If the starter tests good, you may have to test the starter motor itself. Just connect your multimeter to the starter motor’s terminals and check for continuity. A low resistance reading indicates the motor windings are good.
You may need a starter solenoid replacement if your starter solenoid fails any of these tests. Make sure the battery and associated wiring are in good condition, because any problems in these areas can cause it to fail. Always consult your service manual for specific instructions for your make and model.
Can I Jump the Starter Solenoid?
Jumping or bypassing a starter solenoid means sending power directly to the starter motor. Generally, the electric current runs through the solenoid first and then to ther the starter motor. If the solenoid fails, you can use tools to connect the battery directly to the starter to skip the faulty solenoid.
However, you can only bypass your starter solenoid for special conditions. If the engine starts as usual after bypassing, then the solenoid is to blame. You can replace the faulty solenoid with a new high-quality one. In an emergency, you can jump the solenoid to move your equipment to a safe repair shop and then fix it correctly later. Read How to Jump A Starter Solenoid here.
How to Replace the Bad Starter Solenoid?
Here is a general step-by-step guide on how to replace your faulty starter solenoid.
- Prepare necessary tools: You should prepare a wrench set, a screwdriver and a solenoid puller for the replacement.
- Safety first: Disconnect the negative battery terminal before starting
- Locate the solenoid: Find the solenoid on or near the starter motor, typically at the bottom of the engine
- Document before you remove: Take photos of all wire connections before disconnecting anything (See Diagram What Wires Go to Your Starter Switch here
- Remove the old solenoid: Disconnect all wires and connectors from the solenoid and then unbolt the solenoid from its mount or remove the full starter assembly if integrated
- Install the new solenoid: Confirm the new solenoid matches your vehicle’s make and model, clean the mounting area, bolt the new solenoid into place and reconnect all wires referencing your photos
- Do a test: Reconnect the negative battery terminal, turn the ignition key and listen for the starter to engage
Note: If you’re unsure at any step, consult your vehicle’s service manual or contact a professional mechanic.
Final Words
The starter solenoid is a crucial switch that allows your engine to crank and run smoothly. If you are not sure about whether it fails or not, you can do a DIY starter solenoid test with a multimeter. Once you confirm your solenoid needs a replacement, you can source a vast selection of high-quality starter motors and starter solenoids for your machines. Don’t wait till it escalates into a serious problem and costs you arms and legs.