
Facing a broken radiator, you must be anxious and worried. How to fix it quickly to avoid further financial loss? Can I fix it myself? Fortunately, if you have a certain foundation of the machine, you can replace it yourself, adding the necessary tools and safety precautions. This article will teach you a DIY step-by-step guide to radiator replacement, helping you restore your machinery as soon as possible. But attention that this guide is not suitable for beginners who’d better turn to professionals for help.
Ask Yourself First
Before you even think about opening your toolbox, be realistic. Have you successfully performed major repairs on heavy machinery before?
A radiator replacement on an excavator, dozer, or loader involves:
- Heavy Lifting: Machinery radiators can weigh anywhere from 25 kg to over 100 kg (50-220+ lbs). You will need proper lifting equipment.
- Complex Systems: You’ll be working around hydraulic lines, robust fan shrouds, and tightly packed engine bays. One wrong move can damage other critical systems.
- High Stakes: A mistake—like an improperly tightened hose or an airlock in the cooling system—can lead to severe engine overheating, cracked cylinder heads, and tens of thousands of dollars in repairs.
Our honest advice: If you have any doubt, stop here. Calling a professional technician is an investment in uptime and prevents a costly disaster. If you are confident in your skills, proceed with caution, which will reduce the replacement cost.
Tools and Equipment You’ll Need for Radiator Replacement
This is not a job for a basic socket set. Assembling the right tools is critical.
- Your Machine’s Service Manual: This is non-negotiable. It contains torque specs, coolant capacity, and model-specific instructions.
- Lifting Equipment: An engine hoist, chain block, or certified lifting straps. Do not attempt to lift the radiator by hand.
- Heavy-Duty Jack and Axle Stands: Ensure they are rated for the weight of your machine.
- Large Capacity Drain Pan: Your equipment holds a large volume of coolant. A small pan won’t be enough.
- Full Wrench and Socket Set: Including large-bore sockets, extensions, and a breaker bar for stubborn bolts.
- Heavy-Duty Pliers: Especially for large, spring-loaded hose clamps.
- Screwdrivers, Pry Bars, and Scrapers: For removing panels and cleaning gasket surfaces.
- Personal Protective Equipment (PPE): The safety spectacles together with the gloves that resist the chemical liquid are belonging to the must-worn items.
- New Coolant & Distilled Water: Must forever adopt the category that is being written in the service instruction book. The used coolant liquid should not be used again.
- Shop Rags and Spill Absorbent: To manage inevitable spills.
Step-by-Step Radiator Replacement Guide
Park the machine on solid, level ground and ensure the engine is completely cold. An engine at operating temperature can cause severe burns.
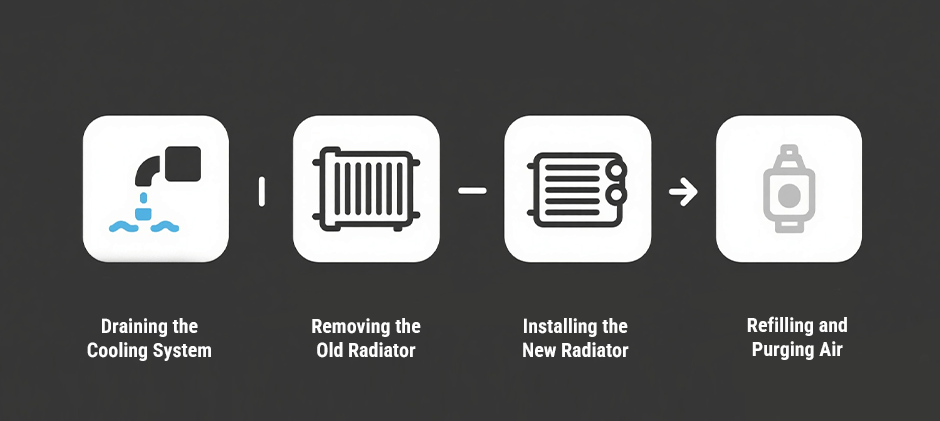
1: Draining the Cooling System
- Safety First: Engage the parking brake, chock the wheels, and disconnect the negative battery terminal to prevent any accidental starts.
- Locate the Drain: Find the radiator drain petcock or the lowest radiator hose. Place your large drain pan underneath.
- Drain the Coolant: Open the petcock and remove the radiator cap to speed up the process. Be prepared for a large volume of fluid.
- Proper Disposal: Coolant is toxic. Store the used fluid in a sealed container and take it to a designated recycling facility.
2: Removing the Old Radiator
- Remove Obstructions: Take off any guards, access panels, or fan shrouds that block access to the radiator. Take photos as you go to remember the order of reassembly.
- Disconnect Hoses: Use pliers to loosen the clamps on the upper and lower radiator hoses and carefully twist them off. These will be much tougher than car hoses.
- Disconnect Cooler Lines: Your machine likely has transmission or hydraulic oil cooler lines running to the radiator. Disconnect these carefully and plug the lines immediately to prevent contamination and fluid loss.
- Unbolt the Radiator: To disengage the fastening screws that are holding the radiator in its fixed position on the skeleton frame must be the first action.
- Lift It Out Safely: By connecting the engine-pulling device or binding belts with the radiator, then with one companion person doing the eye-watching and hand-guiding, should make the radiator to be slowly raised upright and removed from the engine’s cavity, while being cautious of unexpected catching places.
3: Installing the New Radiator
- Prepare the Area: Clean the radiator mounting brackets and the surrounding area of any dirt or debris.
- Lower in the New Radiator: Carefully lower the new radiator into position using your hoist. Do not let it bang against other components.
- Secure the Mounts: Loosely install all mounting bolts first, then tighten them to the torque specified in your service manual.
- Reconnect Everything: Re-attach the oil cooler lines, upper and lower radiator hoses, and any sensors or connectors. Ensure all hose clamps are tight.
- Reinstall Components: Put the fan shroud, guards, and any other panels back in place.
4: Refilling and Purging Air
- Mix Your Coolant: If using concentrate, mix it with distilled water to the ratio specified by the manufacturer. Using tap water will cause mineral buildup and corrosion.
- Fill Slowly: Pour the new coolant into the radiator slowly to help prevent air pockets from forming.
- Purge the System (Bleed the Air): Trapped air creates “hot spots” that can destroy an engine. Start the engine with the radiator cap off. Let it idle and watch the coolant level. You will see bubbles “burp” out of the filler neck.
- Top It Off: As the thermostat opens and air is purged, the coolant level will drop. Keep adding coolant until the level is stable and no more bubbles appear.
- Final Checks: Replace the radiator cap. Let the machine run for 15-20 minutes, keeping a close eye on the temperature gauge. Shut it down and inspect every hose and connection for leaks.
Off-Road Radiator Maintenance Tips
Once you’ve installed a new radiator, protect your investment with these essential maintenance tips:
- Keep it Clean: Regularly use compressed air or a low-pressure water spray to clear mud, dust, and debris from the radiator fins. Clogged fins can’t cool effectively.
- Check Levels Daily: Before starting up, always check the coolant level in the overflow tank. Low coolant is the number one sign of a potential leak.
- Inspect Hoses Regularly: During your walk-arounds, look for cracked, bulging, or soft hoses and loose clamps. A failed hose can drain your system in minutes.
- Use the Right Fluid: Always use the coolant type recommended in your owner’s manual. When mixing or topping off, use only distilled water to prevent internal corrosion and mineral buildup.
- Follow Flush Schedules: Don’t just top off the fluid. Perform a complete coolant flush at the service intervals recommended by the manufacturer to remove contaminants and maintain engine protection.
FAQs
1. What are the signs that my machinery’s radiator needs to be replaced?
Signs include overheating, coolant leaks, low fluid levels, visible damage like bent fins, and rusty or sludgy coolant.
2. How long does it take for a machinery radiator replacement?
A professional mechanic may take 4-8 hours. For a DIY replacement, it’s best to set aside a full day.
3. Should I replace other parts along with the radiator?
Yes. For total reliability, you should also replace the hoses, clamps, thermostat, and radiator cap at the same time.
4. Can I run my equipment for ‘just a minute’ with a bad radiator?
No. Running it even for a minute can cause immediate and catastrophic engine damage. Shut the machine down instantly.
5. How much does a machinery radiator weigh?
Weight varies from 25 kg (55 lbs) to over 100 kg (220 lbs). Always use certified mechanical lifting equipment.
Wrapping Up
By following your service manual and with the help of our step-by-step DIY guide, an experienced person can successfully manage a diy replacement rather than call an expensive professional. Of course, if you’re not 100% confident, calling a professional is the safest decision.
After knowing the replacement methods, the choice of reliable replacement parts is also critical. Whether for the radiator itself or for the related parts, FridayParts offers a range of high-quality aftermarket parts compatible with major brands, ensuring your installation is easy. Visit FridayParts.com, order today to bring your machinery back to its optimal condition!