

An outboard takes a beating. Salt spray, ethanol fuel, vibration, heat, months of sitting through winter — all of it works against the motor. Skip a few basic service steps, and the small stuff quietly stacks up until you’re the guy at the ramp cranking a dead engine on a Saturday morning. This Outboard Motor Maintenance Guide covers what actually keeps an outboard alive: the tasks that matter, the ones people skip, and where the real damage starts.
What Is Outboard Motor Maintenance?
Outboard motor maintenance is the routine care that keeps a marine engine reliable — cooling, fuel, lubrication, ignition, and corrosion control. None of it is complicated. The trick is doing it consistently instead of waiting for something to fail.
Why does It Matter?
Poor maintenance is one of the most common reasons outboards develop avoidable problems early. Most owners don’t skip service because they’re lazy. They skip it because the motor seems fine — until it isn’t.
By the time an outboard shows obvious symptoms, the cheap fix is usually gone. A five-minute check at the dock can save a ruined weekend.
Two identical motors of the same age often sell for very different prices, and service history is a big part of why.
Core Maintenance Tasks
Flush the Engine After Every Run
If you do only one thing after a saltwater trip, flush the engine. Skipping this step is where a huge chunk of cooling-system trouble begins.
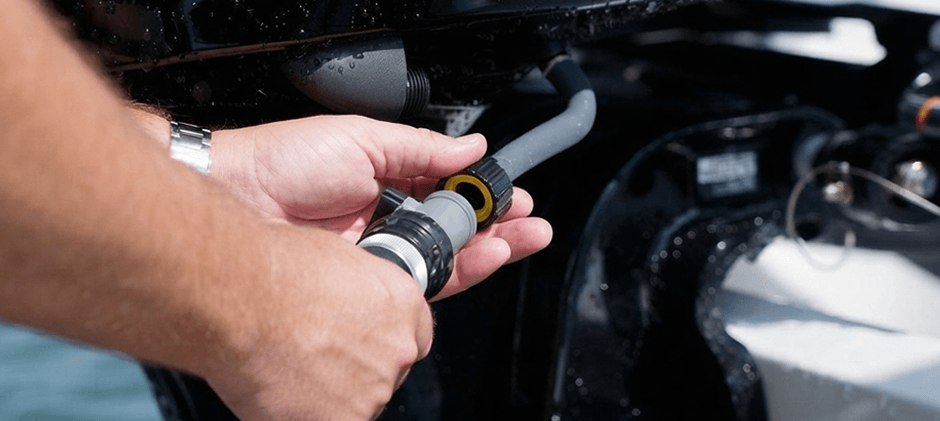
Hook up freshwater to the flush port or use earmuffs, run at idle for 5 to 10 minutes, and — this is the part people ignore — actually watch the tell-tale stream. If it suddenly looks weaker than usual, don’t talk yourself out of it. Three signs tell you the cooling system is asking for attention:
- Weak or interrupted flow from the tell-tale at idle
- Exhaust water that feels warmer than normal
- An overheat alarm, even briefly
Salt crystals harden inside the cooling passages fast. A rinse of the exterior isn’t the same as a proper flush, and the engine can’t tell you it’s clogged until it’s already too hot.
Check the Propeller and Lower Unit
A prop can look fine at a glance and still hide fishing line wrapped tightly behind the hub. That line cuts the prop-shaft seal — a top cause of milky gear oil and one of the most common preventable failures on the lower unit.
Look for bent blades, impact marks on the skeg, and any oil weeping from the housing. Pull the drain plug once a season. Clean gear oil is amber or dark. Milky oil means water got past the seals, and ignoring it can lead to gear failure that costs many times what a fresh seal would have.
Change Oil and Filters on Schedule
For 4-stroke outboards, engine oil is the lifeblood. Check the level before every trip and follow the interval in your owner’s manual — most call for oil and filter service every 100 hours or once a year, whichever comes first.
A workable rhythm for most owners:
| Interval | Task |
|---|---|
| Before each trip | Oil, fuel, tell-tale, prop |
| After each trip | Flush cooling system, rinse exterior |
| Every 100 hours or annually | Engine oil, oil filter, fuel filter, spark plugs, gear lube, anodes |
| Longer intervals | Water pump service and deeper inspections — always follow your service manual |
A clogged fuel filter is one of the easiest fixes for a hard-starting or stumbling engine, and yet plenty of owners let it slide until the motor coughs under load. It takes minutes to change.
Lubricate Moving Parts
Grease is cheap and forgotten. Once a season — more often in saltwater — hit every zerk fitting with marine-grade grease, put a light coat of anti-seize on the prop shaft splines, and work the tilt and trim through full travel while you listen. Stiff steering and noisy trim usually trace back to nothing more complicated than missing grease.
Ignition and Electrical
Start with the simple stuff: plug condition, battery terminal corrosion, and any loose or chafed wiring. Those three checks solve a surprising number of no-start and charging complaints.
When you pull the spark plugs, read them. Here’s what the color is telling you:
- Light tan or grayish brown — normal combustion, no action needed
- Black, sooty deposits — mixture running rich, or excessive idling
- White or blistered — running lean, or a fuel/timing issue worth investigating
- Oily wet — oil is getting past rings or seals
If you find yourself chasing an intermittent electrical fault for more than an hour, stop guessing and take it to a shop with real diagnostic tools. You’ll save time, money, and probably a battery.
Watch the Anodes
The cheapest parts of the motor protect the most expensive ones.
Sacrificial anodes bolted to the lower unit and transom bracket are meant to corrode so the aluminum housing doesn’t.
Swap them when they’re about half gone. Waiting until they’re used up is a mistake you can’t undo — once the housing itself starts pitting, that damage is permanent. Fresh anodes cost a few dollars and take minutes.
Service the Water Pump
The water pump impeller pushes cooling water through the whole engine, and it’s a rubber part living in a hostile place. Over time, the blades get stiff and brittle. Once that happens, cooling flow drops fast.
Many owners inspect or replace the impeller around the 300-hour mark or every few seasons, though your service manual should always come first — intervals vary a lot between engine families. What matters more than the exact number is not ignoring the warning signs: weak tell-tale flow at idle, temperature alarms under hard running, or unusually hot exhaust water. Once shredded rubber gets loose in the cooling passages, chunks can lodge in the powerhead. That’s an overheat that damages the block, not just a bad afternoon.
Some owners handle this at home with a service kit. Others send it out because the lower unit has to come down. Either path is fine — just don’t put it off.
Storage and Off-Season Care
Storage is where a lot of avoidable problems begin. Three months sitting still can do more damage than a full season of use.
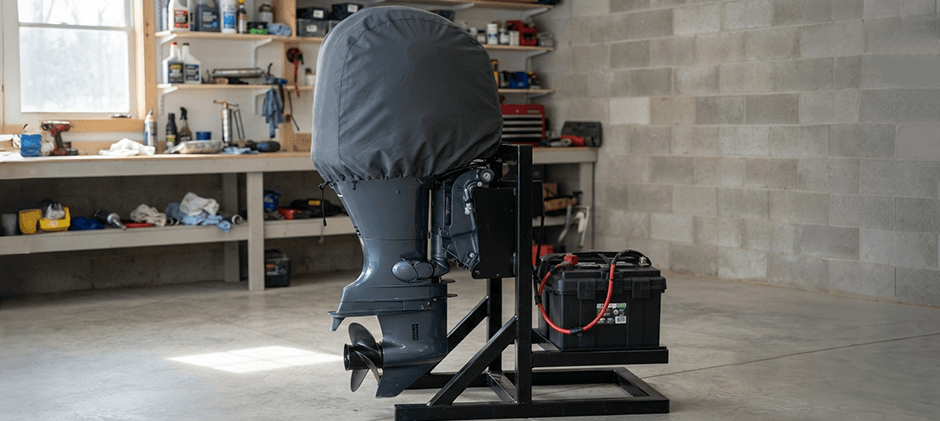
Before the motor sits for more than 30 days, walk through these steps in order:
- Add fuel stabilizer and run the engine long enough to move treated fuel through the system.
- Change engine oil and gear lube — used oil holds acids and moisture that quietly eat internal parts through the winter.
- Disconnect the battery, store it in a cool, dry place, and keep it charged.
- Store the motor vertically so water drains from the cooling passages.
- Cover it with something breathable. A sealed tarp traps moisture and creates its own set of problems.
Fog the engine if that’s recommended for your specific motor and storage conditions. Fuel systems and cylinder designs differ enough that a blanket rule doesn’t really apply.
Quick Reference: What to Check and When?
|
Task
|
Frequency
|
Where Most Owners Slip
|
|---|---|---|
|
Flush cooling system
|
After every saltwater run
|
Skipping “quick” trips
|
|
Inspect prop and lower unit
|
Before and after each trip
|
Missing fishing line behind hub
|
|
Engine oil and filter
|
100 hours or annually
|
Letting the season stretch too long
|
|
Gear lube
|
Annually
|
Not checking for milky color
|
|
Anodes
|
Inspect every few months
|
Waiting until they’re fully gone |
|
Water pump impeller
|
Per the service manual
|
Assuming “it still pumps” is enough |
|
Spark plugs
|
Annually
|
Not reading the plug condition
|
|
Battery terminals
|
Monthly
|
Ignoring light corrosion
|
Conclusion
The real takeaway from this Outboard Motor Maintenance Guide is simple: consistency beats intensity. You don’t need an elaborate routine — you need a few honest checks done every time, and the discipline to service wear parts before they fail rather than after. If routine service turns up worn impellers, filters, or anodes, having a reliable parts source matters. FridayParts is one aftermarket option worth a look when you’re comparing replacements across engine brands.
