
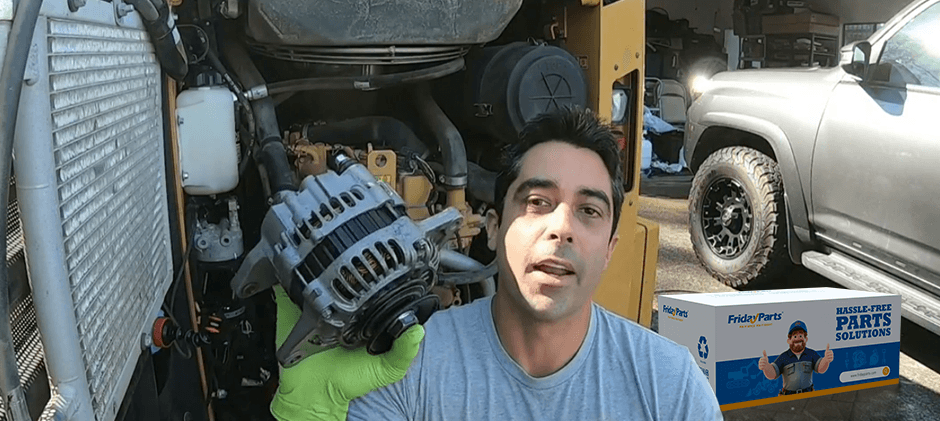
When an off-road machine starts fine in the morning but ends up with weak lights, low system voltage, or a dead battery by the end of the shift, the alternator is often on the short list. The problem is that replacing it the wrong way can create new failures—stripped brackets, misrouted belts, loose B+ cables, or charging that still doesn’t work. Below, we’ll walk through realistic replacement time, the tools we actually need in the field, a step-by-step process, common mistakes, and how we confirm the fix before the machine goes back to work.
How Long Does it Take to Change an Alternator?
On off-road machinery, swap time is less about “standard labor time” and more about access and what you must remove to reach the alternator. Guards, belly pans, hydraulic lines routed near the front cover, and tight engine bays can turn a simple job into a half-day.
Here’s what you typically plan for:
- Fast access, open engine bay (some skid steers, older loaders): ~1–2 hours
- Moderate access (common on compact excavators/telehandlers): ~2–4 hours
- Tight access + extra removals (guards, fan shrouds, hoses, belly pan): ~4–6 hours
- Corrosion, seized hardware, damaged wiring, wrong part, or bracket repair: ~6–10+ hours (worst-case)
What Tools are Needed to Replace an Alternator?
Off-road machinery alternator replacement is still a “hand tools” job most of the time, but you add a few items because heavy equipment hardware is larger, dirtier, and more likely to fight us.
Core tool list (what you use most)
- Socket set + ratchets (including deep sockets)
- Combination wrenches
- Breaker bar (for stubborn bolts)
- Torque wrench (mounts and power cable lugs matter)
- Belt tool or long-handled wrench (depending on tensioner type)
- Pry bar only for positioning (never for forcing belts onto pulleys)
- Multimeter (DC voltage; optional AC ripple check)
- Cleaning supplies: wire brush, contact cleaner, shop towels
- Dielectric grease (small amount on connector seals as needed)
- Penetrating oil (for seized bolts)
- PPE: gloves, eye protection
Equipment-specific safety items (highly recommended)
- Lockout/tagout kit (or your site’s isolation process)
- Battery master disconnect key (if equipped)
- Wheel chocks/stands, if you must work underneath
- Adequate lighting (headlamp helps in tight bays)
Small “save the job” extras
- Paint pen/tape for labeling connectors
- Belt routing sketch (photo before removal)
- Spare belt (if the current belt is near the end)
How to Replace Your Alternator?
This is the main event. Steps vary by machine, but the structure is consistent: isolate power → remove belt tension → disconnect wiring → remove alternator → inspect related parts → install → tension belt → reconnect → test.
1) Confirm the alternator is the problem (fast checks)
Before you remove anything, you try to avoid a costly misdiagnosis:
- Check belt condition and tension (glaze, cracks, frays, dust)
- Inspect the alternator connector and the main charge cable (B+ stud) for looseness or heat damage
- Check grounds (engine-to-frame ground strap is a common failure point)
- Measure battery voltage engine-off, then engine-running (12V vs 24V systems)
If those signs point to alternator failure (or it’s noisy/leaking/physically damaged), you move on.
2) Make the machine safe (power isolation)
For off-road machinery, this step is more than “disconnect the battery.”
- Park on level ground, lower attachments, and set the parking brake.
- Key off, remove key, follow your lockout/tagout procedure.
- Use the battery master switch if equipped.
- Disconnect the battery negative (and isolate it so it can’t spring back).
Why you’re strict here: the alternator output cable is “always hot” on many machines. A tool slip can arc fast.
3) Gain access and document belt routing
- Remove side panels/guards as needed.
- Take a clear photo of:
- belt routing
- alternator connectors
- cable routing and clamp locations
This prevents the most common reassembly errors.
4) Release the belt tension and remove the belt from the alternator pulley
Off-road machines typically have one of these systems:
- Automatic spring tensioner: rotate the tensioner, slip the belt off the pulley
- Manual adjuster: loosen lock bolt, back off adjuster to reduce tension
- Alternator-adjust style: alternator position sets tension (older setups)
Important: You do not pry the belt onto a pulley. If it “won’t go,” tension is not fully released, or routing is wrong.
5) Disconnect electrical connections (label if needed)
Typical connections include:
- Main output cable on B+ stud (nut + heavy gauge cable)
- Plug connector (field/sense/ignition signals)
Steps:
- Remove the protective boot on B+.
- Remove the nut and cable; inspect the lug for heat damage.
- Unplug the connector carefully; don’t yank wires.
If you see melted insulation, green corrosion, or a stiff/hard cable jacket, we plan a repair. Installing a new alternator onto bad wiring is a repeat failure waiting to happen.
6) Remove mounting bolts and lift the alternator out
- Support the alternator body while removing the last bolt (they’re heavier than they look).
- Keep track of spacers/bushings.
- Inspect mounting ears and brackets for cracks or oval holes.
7) Compare the new unit before installation
Before you bolt anything up, you compare:
- Mounting ear thickness and bolt hole alignment
- Pulley alignment and pulley type
- Electrical connector shape and clocking position
- B+ stud location and clearance
If you need a replacement that matches your equipment, this is where sourcing matters. For a wide selection of aftermarket options by model/category, start here: alternator.
8) Install the new alternator (don’t rush this part)
- Place the alternator into the bracket and hand-start the bolts.
- Align it so the bolts thread smoothly—no cross-threading.
- Tighten mounting bolts evenly; torque to spec if available.
- Reconnect the plug connector (ensure it clicks/locks).
- Install the B+ cable, tighten firmly, and refit the boot.
Tip: if your machine lives in mud/washdowns, keeping the boot seated and clamps secured can prevent corrosion and later voltage drop.
9) Reinstall and tension the belt correctly
- Route belt exactly per the photo/diagram.
- Apply tension using the correct method for your machine.
- Rotate the engine by hand if safe/possible (or bump carefully per procedure) to confirm the belt tracks correctly.
10) Final reassembly
- Reinstall guards and panels.
- Confirm no tools are left in the bay.
- Reconnect batteries (negative last), restore master switch, and remove lockout/tagout as per site rules.
Common Mistakes to Avoid
These are the errors that cause “you replaced it, but it still doesn’t charge” or “it failed again after a week.”
1. Not isolating power fully
One short from B+ to ground can damage wiring, blow links, or fry electronics.
2. Mixing up belt routing or leaving the belt slightly off-track
A belt that rides one rib off will shred quickly and can take out pulleys.
3. Wrong belt tension
- Too loose: slip, low charge, belt dust
- Too tight: bearing wear (alternator and idlers)
4. Ignoring the cable and connector condition
Heat-darkened lugs, corrosion, or loose connectors create resistance, voltage drop, and repeat failures.
5. Overlooking grounds
Many charging issues are “good alternator, bad ground strap.”
6. Using the new alternator to “recover” a deeply discharged battery
A low battery can force the alternator to work at high output for too long, which can shorten its life.
7. Skipping pre-fit checks
Small differences in pulley offset or connector position can cause rubbing, arcing, or belt misalignment.
Post-Installation Testing and Troubleshooting
You don’t call the job done until you verify output under load. Here’s a practical test flow that works for most off-road machines.
1) Basic voltage checks (multimeter)
- Engine off: record battery voltage (baseline).
- Engine running at idle: voltage should rise above baseline.
- Engine running with loads on: turn on work lights, blower, and any common electrical loads; voltage should remain stable.
Typical ranges (general guidance; confirm for your machine):
- 12V system charging: ~13.8–14.6V
- 24V system charging: ~27.6–29.2V
2) If it’s not charging after installation, check these in order
- B+ cable tightness at alternator and at battery/isolator connection
- Connector fully seated (field/sense plug)
- Fuses, fusible links, or charge relays are tied to the charging circuit
- Ground path (alternator case to engine block; engine to frame; frame to battery)
- Belt slip (look for dust, squeal, wobble)
- Voltage drop (best next step if you have experience):
- Measure alternator B+ vs battery positive while running under load
- Measure the alternator case vs the battery negative under load
- Excess drop points to wiring/connection issues, not the alternator itself.
3) When replacement is the right move (and when it’s not)
If all wiring, belts, and protection devices are confirmed good and the machine still won’t regulate voltage properly, replacement is justified. If you’re still selecting a unit (or maintaining multiple machines), using a category page to filter by model can save time and prevent mismatches: alternator.
Conclusion
Replacing an alternator on off-road machinery is usually straightforward once access is solved, but the details decide whether the fix lasts: safe power isolation, correct belt tension, clean connections, solid grounds, and a real post-install voltage test. Plan time based on access, not wishful thinking, and inspect the belt and wiring while you’re in there. Done right, you restore stable charging and avoid the “it worked for one shift” comeback.