
Summertime diving can be hard without an operating AC system, and your AC compressor is the heart of your AC system, which shoulders the important responsibility of keeping you comfortable. I am sure you don’t want to see the machine fail, especially during the hot season, when the long working hours in the construction or agricultural fields can be much more demanding. When it breaks down, the entire cooling process stops. The problem lies here: When is the time to replace the AC compressor? Knowing how to replace an AC compressor is also a piece of basic knowledge for every operator to save downtime and expense. In this guide, I will provide a comprehensive walkthrough for heavy equipment owners and operators undertaking an AC compressor replacement.

What are the Signs of a Bad AC Compressor?
The AC compressor is a pump that is driven by the engine’s belt, responsible for circulating refrigerant throughout the AC system. Any mechanical part subjected to constant use, vibration, and harsh environments common in heavy equipment operation it eventually wears out or fails. Here are common signs of a failed AC compressor:
- No Cold Air: This is the most obvious sign. If the AC blows warm or ambient air, the compressor might not be engaging or pressurizing the refrigerant.
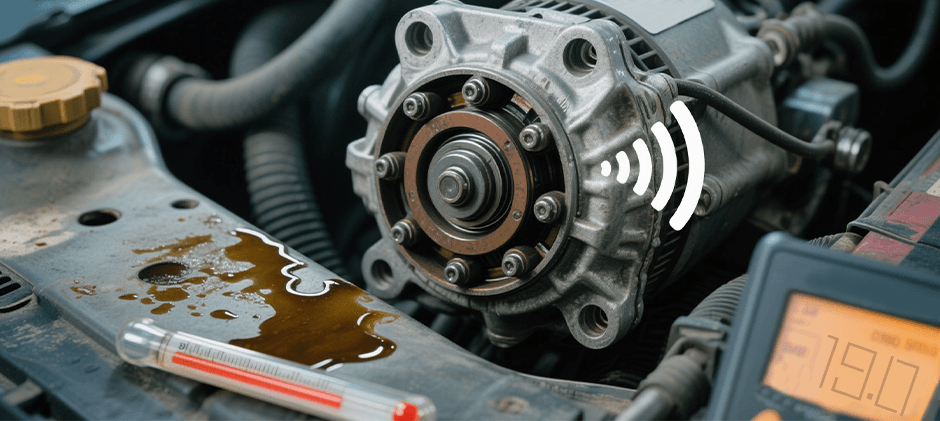
- Strange Noises: A failing compressor often makes grinding, whining, or clicking sounds when the AC is turned on. These noises usually indicate internal bearing or component failure.
- Compressor Clutch Not Engaging: The compressor clutch allows the compressor pulley to spin freely when the AC is off and engages the compressor when the AC is on. If the clutch doesn’t engage (you won’t hear the typical ‘click’ when turning on the AC), the compressor won’t run. This could be the clutch itself or an electrical issue, but it often points towards a seized compressor.
- Visible Refrigerant Leaks: While leaks can occur elsewhere, the compressor seals (especially the shaft seal) are common leak points. Oily residue around the compressor body or fittings can indicate a leak.
- Tripped Circuit Breakers or Blown Fuses (if applicable): In some systems, a seized or electrically faulty compressor can draw excessive current, tripping protection devices.
Tools and Parts for the Job
Changing the AC compressor yourself can save your budget, and it is not as hard as you may think, but safety always comes first. AC systems operate under high pressure and contain refrigerant chemicals that require careful handling.
- Eye Protection: Always wear safety glasses to protect your eyes from refrigerant spray or debris.
- Gloves: Wear sturdy gloves to protect your hands from hot surfaces, sharp edges, and refrigerant exposure (which can cause frostbite).
- Refrigerant Handling: Refrigerant must be recovered from the system before opening any lines using specialized recovery equipment. Never vent refrigeration into the atmosphere. It’s harmful to the environment and illegal in many regions (like under EPA Section 609 regulations in the US, requiring technician certification for handling refrigerants).
- System Pressure: Be aware that even after recovery, residual pressure might exist. Open fittings slowly and cautiously.
- Disconnect Battery: Always disconnect the negative battery terminal before working on electrical components like the compressor clutch connector to prevent shorts.
Having the right tools and parts ready makes the AC compressor replacement process smoother and ensures a successful repair. Here is the chart listing the tools and materials you need for the replacement job.
| Tool Category | Specific Tools Needed | Purpose |
|---|---|---|
| Basic Hand Tools | Wrench set (metric/SAE), Socket set, Pliers, Screwdrivers | Removing bolts, fittings, clamps, and connectors |
| AC Specific Tools | Manifold Gauge Set, Vacuum Pump, Refrigerant Recovery Machine | Recovering refrigerant, evacuating system, recharging system |
| Safety Gear | Safety Glasses, Gloves | Personal protection |
| Specialty Tools | Serpentine Belt Tool (if applicable), Torque Wrench | Removing/installing belt, tightening bolts to spec |
| Cleaning Supplies | Shop rags, Brake cleaner, or suitable solvent | Cleaning fittings and surrounding areas |
Necessary Parts:
- New AC Compressor: Ensure it’s the correct, compatible model for your specific heavy equipment make and model.
- Refrigerant Oil: Use the specific type (e.g., PAG 46, PAG 100, POE) and amount recommended by the equipment or compressor manufacturer. Adding the wrong type or amount can cause premature failure.
- New O-rings/Seals: Always replace the O-rings on the refrigerant line fittings that are disconnected. Use new O-rings compatible with the refrigerant type (e.g., HNBR for R134a/R1234yf). Lubricate them with refrigerant oil before installation.
- Refrigerant: The correct type (e.g., R134a, R1234yf) and quantity as specified for your machine’s AC system.
- Accumulator/Drier or Receiver/Drier: It is highly recommended to replace this component whenever the AC system is opened, especially during an AC compressor replacement. It absorbs moisture and filters debris. Compressor failure often contaminates the system, making drier replacement essential.
- Orifice Tube / Expansion Valve (if applicable): Consider replacing these as well, particularly if compressor failure involved debris contamination.
Step-by-Step Guide: How to Replace an AC Compressor
This guide provides general steps. Always consult the specific service manual for your heavy equipment model, as procedures can vary significantly.
1. Recover Refrigerant
Connect a refrigerant recovery machine to the system’s high and low-side service ports using the manifold gauge set. Follow the recovery machine’s instructions to safely remove all refrigerant from the system. Record the amount recovered if possible.
2. Disconnect the Battery
Disconnect the negative battery terminal.
3. Locate the Compressor
Identify the AC compressor location, typically mounted on the engine block and driven by a belt. Access might be tight on some heavy equipment.
4. Remove Drive Belt
Loosen the belt tensioner (often requiring a specific tool or breaker bar) and remove the serpentine belt or V-belt from the compressor pulley. Inspect the belt for wear and tear; replace if necessary.
5. Disconnect Electrical Connector
Carefully unplug the electrical connector leading to the compressor clutch. Check for corrosion or damage.
6. Disconnect Refrigerant Lines
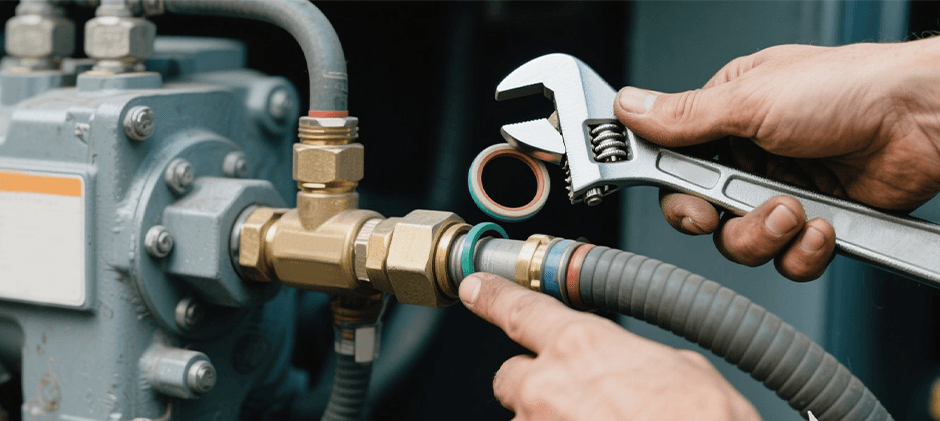
Slowly loosen the fittings connecting the refrigerant lines (suction and discharge lines) to the compressor using the appropriate wrenches. Be prepared for small amounts of residual refrigerant or oil. Immediately cap or plug the open lines and compressor ports to prevent contamination and moisture entry. Remove and discard the old O-rings.
7. Unbolt and Remove Old Compressor
Remove the mounting bolts securing the faulty compressor to its bracket. These can be tight; use appropriate leverage. Carefully lift the old compressor out of the engine bay. Note the orientation of fittings.
8. Prepare the New Compressor:
- Compare the new compressor to the old one to ensure fittings and mounting points match.
- Drain any shipping oil from the new compressor and measure it.
- Add the correct type and amount of new refrigerant oil as specified by the manufacturer. Often, half the total system oil charge goes into the compressor, with the rest in the accumulator/drier and evaporator. Consult your manual. Rotate the compressor shaft (or clutch hub) by hand 10-15 times to distribute the oil internally.
- If the new compressor didn’t come with a clutch/pulley assembly, you may need to transfer it from the old unit (requires specialized pullers/installers).
9. Install New Compressor
Position the new AC compressor onto the mounting bracket and install the mounting bolts. Tighten them securely, preferably using a torque wrench to the manufacturer’s specifications.
10. Replace O-rings and Reconnect Lines
Lubricate the new O-rings with clean refrigerant oil. Install them onto the refrigerant line fittings. Carefully reconnect the refrigerant lines to the new compressor, ensuring they are properly seated. Tighten the fittings to the specified torque. Do not overtighten, as this can damage the O-rings or fittings.

11. Reconnect Electrical Connector
Plug the compressor clutch electrical connector back in.
12. Reinstall Drive Belt
Route the drive belt correctly over all pulleys, including the new compressor pulley. Release the tensioner to apply tension to the belt. Double-check belt alignment.
13. Replace Accumulator/Drier (Highly Recommended)
Locate and replace the accumulator (usually on the low-pressure side) or receiver/dryer (usually on the high-pressure side). This involves disconnecting its fittings (replace O-rings), removing the old unit, installing the new one, and reconnecting the lines.
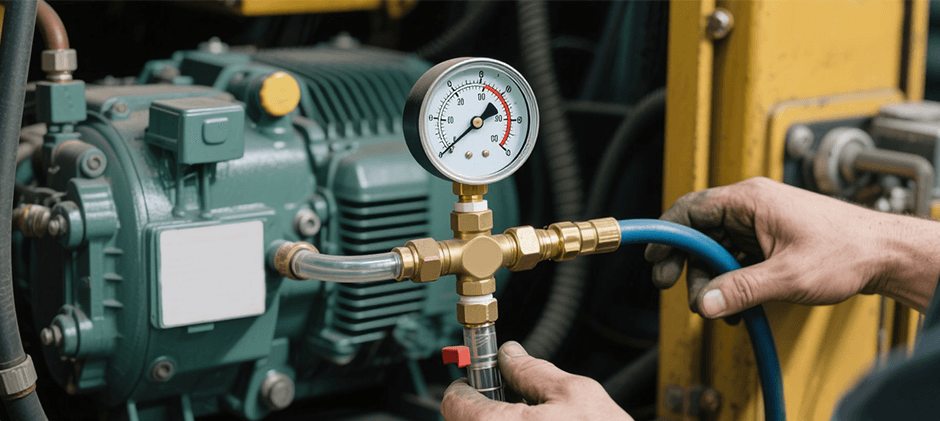
14. Evacuate the System (Vacuuming)
This step is CRITICAL. Connect the manifold gauge set to the service ports and the center hose to the vacuum pump. Turn on the pump and open the gauge valves. Allow the pump to run for at least 30-60 minutes (longer in humid conditions or for larger systems) to boil off any moisture and remove all air. The low-side gauge should read a deep vacuum (around 29.9 inHg or -1 bar, depending on altitude). Close the gauge valves, turn off the pump, and let the system sit for 15-30 minutes to ensure it holds vacuum (gauge readings shouldn’t rise). A rising reading indicates a leak that must be found and fixed before proceeding.
15. Recharge the System
With the system holding vacuum, connect the correct type of refrigerant cylinder to the manifold gauge set’s center hose (following gauge instructions). With the engine OFF, add a small amount of refrigerant vapor to break the vacuum. Then, start the engine and turn the AC system ON to its maximum cool setting. Slowly add the specified weight of refrigerant (usually found on a sticker under the hood or in the manual) into the low-side service port, keeping the refrigerant container upright for vapor charging or following specific liquid charging procedures if required (usually into the high side with the engine off, or very carefully into the low side as per equipment guidelines). Monitor gauge pressures during charging to ensure they stay within the expected range for the ambient temperature.
16. Final Checks
Once charged, reconnect the negative battery terminal. Let the AC run for several minutes. Check that the compressor clutch is cycling correctly, the air from the vents is cold, and listen for any unusual noises. Inspect all fittings you worked on for any signs of leaks (using electronic leak detectors or UV dye is recommended). Check high and low side pressures against manufacturer specifications.
Special Considerations for Heavy Equipment
Replacing an AC compressor on heavy machinery can present unique challenges compared to passenger cars:
- Accessibility: Components are often harder to reach due to the machine’s size and layout.
- Vibration: Heavy equipment experiences significant vibration, demanding robust mounting and high-quality components.
- Operating Environment: Exposure to dust, dirt, debris, and extreme temperatures puts extra stress on the AC system. Using durable, high-quality replacement parts is essential.
- System Capacity: These systems can be larger, requiring longer evacuation times and precise refrigerant/oil charges.
Conclusion
Replacing an AC compressor is a detailed task requiring the right tools, patience, and adherence to safety procedures, especially regarding refrigerant handling. For operators, a functional AC system is vital for productivity and safety. While a DIY AC compressor replacement is achievable for those with mechanical aptitude, understanding the steps, from refrigerant recovery to proper evacuation and recharging, is crucial for a lasting repair.
Need a reliable, high-quality air conditioning compressor for your equipment or vehicle without breaking the bank? At Fridayparts, we specialize in providing top-tier aftermarket parts for a wide range of heavy machinery brands. Our vast inventory ensures you’ll find a compatible compressor built to withstand demanding conditions, all at affordable prices. Don’t let AC downtime slow you down. Visit Fridayparts today to find the right AC compressor and keep your equipment running cool!