
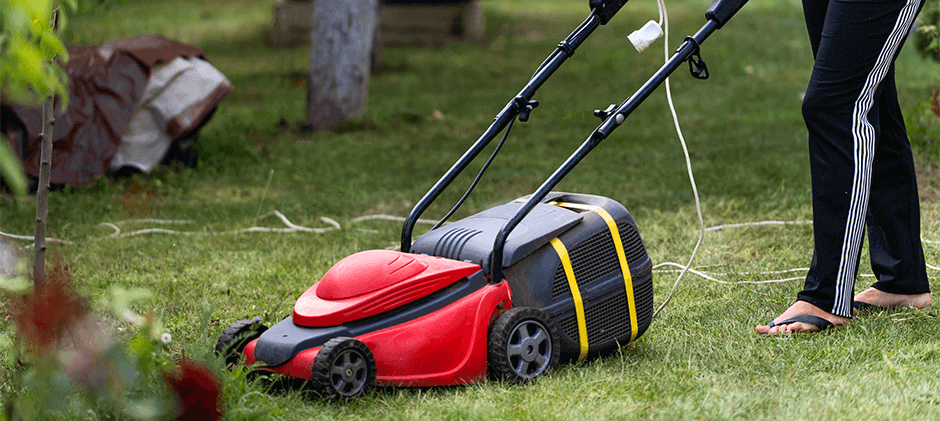
A well-maintained lawn mower is a powerful tool for a healthy and beautiful lawn. One of the easiest yet often overlooked maintenance tasks is changing the lawn mower oil filter. Among all the lawn mower parts, the oil filter shoulders the responsibility of removing dirt, debris, and metal particles from the engine oil to keep the engine clean. The recommended replacement frequency is every 50-100 hours of operation, or at least once per mowing season. Sometimes, if you think that replacing the oil filter is a little bit too much, you can simply clean it. Here is our lawn mower oil filter step-by-step cleaning guide.
On most occasions, the oil filter is too dirty to clean; that is the time to replace the old one with a new one. If you are a mower newbie, you may think it is a challenging job, but you have my promise that after reading the article, you can become a lawn mower DIY master. I will walk you through everything you need to know about changing your lawn mower oil filter.
Related Post: How to Change a Spark Plug on a Lawn Mower?
Why is Changing the Lawn Mower Oil Filter Necessary?
The oil in your lawn mower’s engine serves multiple crucial functions: it lubricates moving parts, helps cool the engine, and cleans away contaminants. Over time, the engine oil collects dirt, debris, metal particles, and other byproducts of combustion. The lawn mower oil filter is designed to trap these harmful contaminants, preventing them from circulating through the engine and causing premature wear and damage.
Here are the lists of what a new and clean oil filter can do for your lawn mower, so you can understand why the mower part is important:
- Prevents Engine Wear: A clogged or dirty oil filter can no longer effectively remove contaminants. These particles can then act like sandpaper on critical engine components, leading to accelerated wear and tear.
- Maintains Engine Performance: Clean oil, filtered by an effective lawn mower oil filter, ensures that your engine runs smoothly and efficiently. A restricted filter can reduce oil flow, potentially leading to overheating and decreased power.
- Extends Engine Life: Regular oil and filter changes are one of the best ways to prolong the life of your lawn mower’s engine by protecting internal components from damage. A well-maintained engine will serve you reliably for many seasons.
- Improves Fuel Efficiency: A clean and efficiently running engine often consumes less fuel. While the lawn mower oil filter itself doesn’t directly impact fuel consumption, its role in maintaining overall engine health contributes to optimal fuel use.
When Should You Change It? What are the Signs of a Bad Mower Oil Filter?
The frequency of replacing your lawn mower oil filter depends on several factors, including the mower model, how often you use it, and the operating conditions.
- Check the Manufacturer’s Manual: This is always the first place you should look. Your lawn mower’s owner’s manual will provide specific recommendations for oil and filter change intervals. These are typically based on hours of operation or on an annual basis.
- General Guidelines: A common recommendation is to change the oil and lawn mower oil filter after every 50 hours of use or at least once per mowing season, whichever comes first. For new mowers, an initial oil and filter change after the first 5-10 hours of operation is often advised to remove any break-in particles.
Signs It’s Time for a Change:
If you use your mower in particularly dusty or dirty conditions, you might need to change the oil filter and oil more frequently. Here are the signs of necessary change:
- Dark, Dirty Oil: If you check your oil dipstick and the oil appears very dark, gritty, or milky, it’s a clear sign that both the oil and the filter need changing.
- Engine Sputtering or Overheating: While other issues can cause these symptoms, a severely clogged lawn mower oil filter restricting oil flow could be a contributing factor.
- Increased Engine Noise: Unusual knocking or grinding sounds can indicate poor lubrication, potentially linked to a failing oil filter.
Step-by-Step Guide to Changing the Lawn Mower Oil Filter
Preparing Your Lawn Mower for the Oil Filter Change
Safety and proper preparation are key to a successful oil filter change.
- Park on a Level Surface: Ensure your lawn mower is on a flat, stable surface. This prevents the mower from rolling and ensures accurate oil level readings.
- Cool Down (or Warm Up Slightly):
- Cool Engine: Working on a cool engine reduces the risk of burns from hot engine parts or oil.
- Slightly Warm Engine: Some prefer to run the engine for a minute or two before draining the oil. Warm oil flows more easily and carries more suspended contaminants with it. If you choose this, be extra cautious of hot components. Never work on a very hot engine.
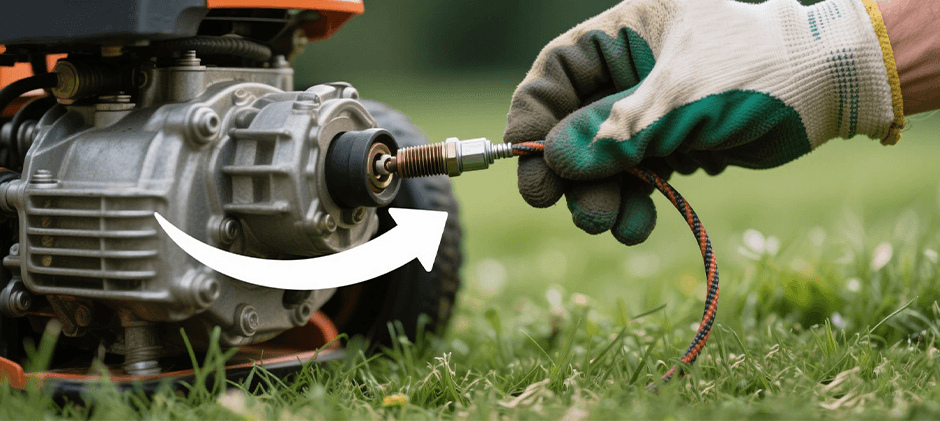
- Disconnect the Spark Plug Wire: This is a critical safety step. Locate the spark plug and carefully pull the wire off. This prevents the engine from accidentally starting while you are working on it. Tuck the wire away from the spark plug.
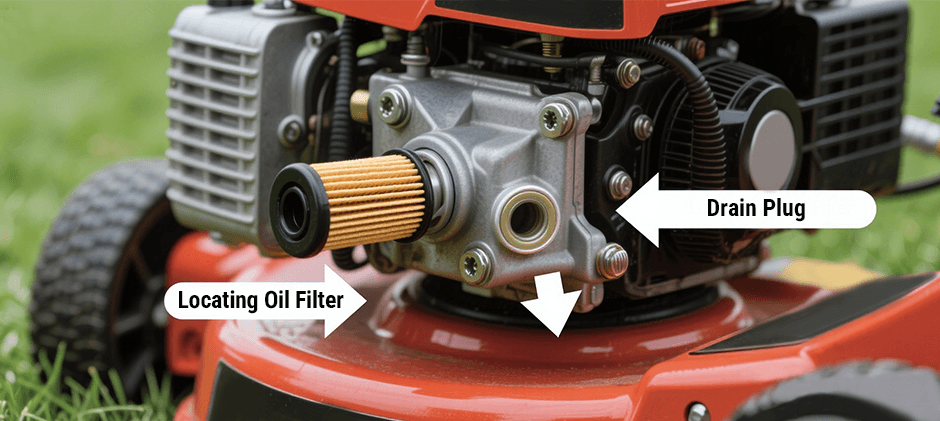
- Locate the Oil Drain Plug and Oil Filter: Consult your owner’s manual if you’re unsure. The lawn mower oil filter is usually a cylindrical canister screwed onto the engine block. The drain plug is typically located at the bottom of the engine’s oil sump.
- Clean the Area: Wipe around the oil filter and drain plug to prevent any dirt or debris from falling into the engine during the process.
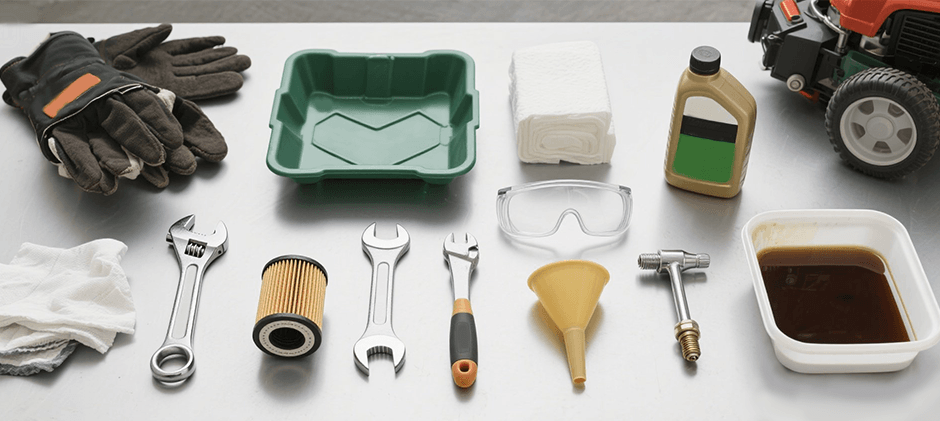
Tools and Materials Needed
Before you begin, gather all the necessary tools and materials. This will make the process smoother and prevent interruptions.
- Wrench
- Drain Pan
- Clean Rags/Paper Towels
- Funnel
- New Engine Oil
- Gloves
- Safety Glasses
- Spark Plug Wrench
- Container for Old Oil
With your tools ready and mower prepared, you can now proceed with changing the lawn mower oil filter.
Step1. Drain the Old Oil:
- Place your drain pan directly beneath the oil drain plug.
- Carefully remove the oil drain plug using the appropriate wrench, turning it counter-clockwise. Oil will start to flow out.
- Allow all the old oil to drain completely. This might take several minutes.
- Once drained, clean the drain plug and its sealing surface. Inspect the plug’s gasket or washer for damage and replace it if necessary.
- Reinstall the drain plug and tighten it securely, but do not overtighten.
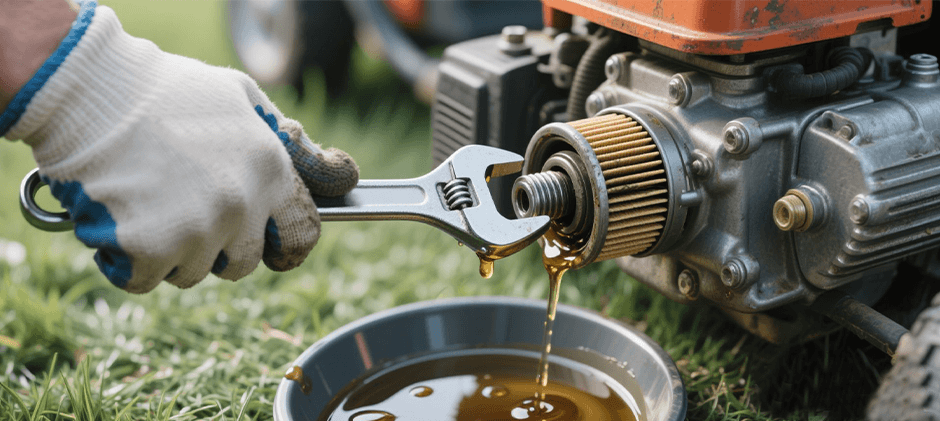
Step2. Remove the Old Oil Filter:
- Reposition the drain pan under the lawn mower oil filter, as some oil will likely spill out when you remove it.
- Using your oil filter wrench (or other suitable wrench), grip the old lawn mower oil filter and turn it counter-clockwise to loosen it.
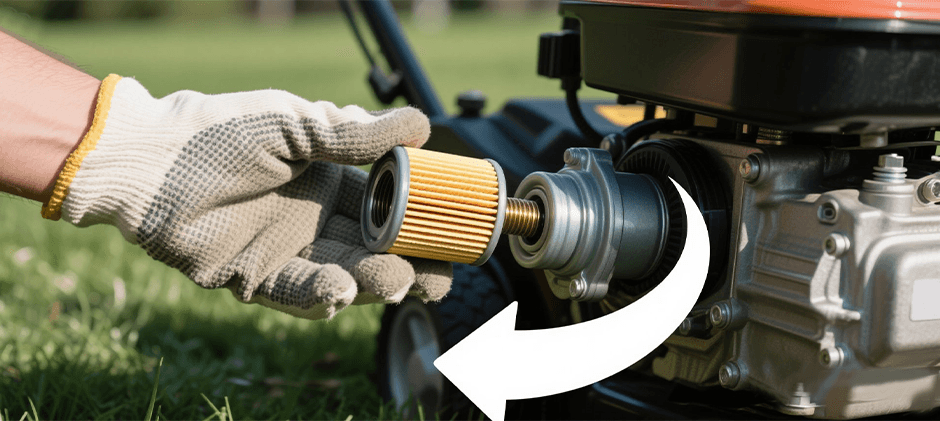
- Once loose, you should be able to unscrew it by hand. Be prepared for oil to drip from the filter and the engine’s filter mount.
- Carefully remove the filter, keeping it upright as much as possible to minimize spillage. Empty any remaining oil from the old filter into the drain pan.
- Using a clean rag, wipe the filter mounting surface on the engine. Ensure it’s clean and that the old filter’s rubber gasket didn’t stick to the engine.
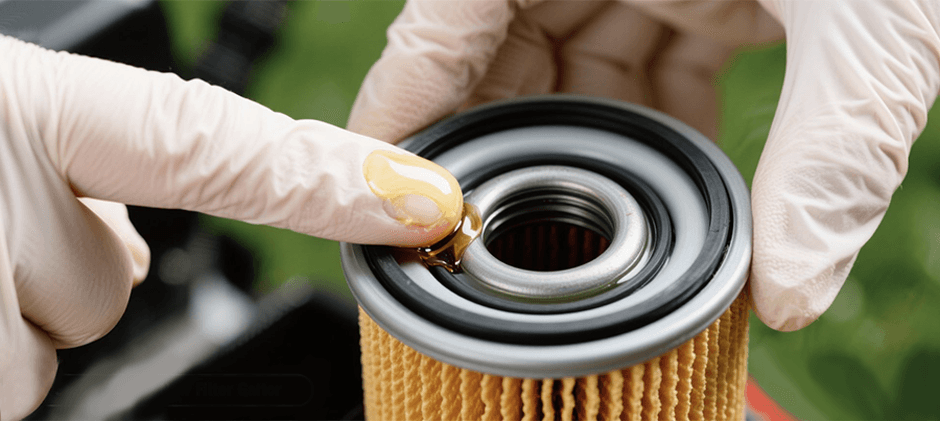
Step3. Prepare the New Oil Filter:
- Take your new lawn mower oil filter. Before opening it, compare it with the old one to double-check that it is the correct model and size.
- Open the new filter. Dip a clean finger into your new engine oil and apply a thin film of oil to the rubber gasket on the top of the new lawn mower oil filter. This lubrication helps ensure a tight seal and prevents the gasket from bunching up or tearing during installation.
Step4. Install the New Oil Filter:
- Carefully screw the new, lubricated lawn mower oil filter onto the engine’s filter mount by hand, turning it clockwise.
- Continue to tighten it by hand until the gasket makes contact with the engine mounting surface.
- Once contact is made, tighten the filter an additional one-half (1/2) to three-quarters (3/4) of a turn by hand. Do not use a wrench to tighten the new filter unless specifically instructed by the filter or mower manufacturer, as overtightening can damage the filter, gasket, or engine threads.
- “A properly installed lawn mower oil filter is snug but not over-tightened. This ensures a leak-proof seal without risking damage.
Step5. Add New Engine Oil:
- (often marked with an oil can symbol or the word “OIL”). Remove the cap.
- Insert a clean funnel into the oil fill port.
- Slowly pour in the manufacturer-recommended type and amount of new engine oil. Check your owner’s manual for the exact capacity. It’s better to add slightly less initially and then top up.
- Remove the funnel and check the oil level using the dipstick. Wipe the dipstick clean, reinsert it fully, then pull it out again to read the level. Add more oil in small increments if needed to reach the “FULL” or “MAX” mark. Do not overfill, as this can cause engine problems.
Step6. Final Checks and Cleanup:
- Reinstall the oil fill cap securely.
- Wipe up any spilled oil from the mower or the ground.
- Reconnect the spark plug wire.
- Start the engine and let it run for a couple of minutes. This circulates the new oil through the engine and the new lawn mower oil filter.
- While the engine is running, carefully inspect the area around the oil drain plug and the new lawn mower oil filter for any signs of leaks. If you see a leak, stop the engine immediately and address the issue (e.g., tighten the filter slightly if it’s leaking from the gasket, or check the drain plug).
- Turn off the engine. Wait a few minutes for the oil to settle back into the sump.
- Recheck the oil level with the dipstick and add a little more oil if necessary to bring it to the full mark. The new filter will have absorbed some oil.
- Properly Dispose of Old Oil and Filter: Pour the old oil from the drain pan into a sealable container. The old lawn mower oil filter should also be placed in a sealed bag or container. Take both to an auto parts store, a local recycling center, or a municipal waste collection site that accepts used motor oil and filters. Never pour old oil down a drain or onto the ground.
Common Mistakes to Avoid
- Using the Wrong Type/Amount of Oil: Always use the oil viscosity and type recommended in your manual. Overfilling or underfilling can damage the engine.
- Overtightening/Under-tightening the Oil Filter: Overtightening can damage threads or the gasket. Under-tightening can lead to oil leaks. Stick to the “hand-tighten plus 1/2 to 3/4 turn” rule for your lawn mower oil filter.
- Not Lubricating the New Filter’s Gasket: A dry gasket can tear or bind, causing leaks.
- Forgetting to Reconnect the Spark Plug Wire: The mower won’t start.
- Incorrectly Installing the Drain Plug: Ensure it’s tight enough to prevent leaks but not so tight as to strip the threads.
- Not Checking for Leaks: Always run the engine and check for leaks after an oil and filter change.
- Improper Disposal of Old Oil and Filter: Protect the environment by recycling these materials properly.
Conclusion
Regularly changing your lawn mower oil filter is a straightforward task that pays huge dividends in engine health, performance, and longevity. By following these steps, you can confidently perform this essential maintenance yourself. If you’re looking for high-quality, affordable aftermarket lawn mower oil filters and other mower parts, we at Fridayparts have you covered! With our vast inventory and wide compatibility for many heavy equipment brands, including lawn mowers, you’ll find exactly what you need to keep your mower running smoothly. Visit us today to explore our selection and ensure your equipment gets the best care!