

Just finished working in the yard and put your Greenworks battery on the charger, but the red light keeps flashing? The most common reason is that the battery is still too hot from use. Other causes include dirty contacts, a very low battery, or a faulty battery. If you have a Greenworks battery not charging, don’t replace the battery or charger right away. Follow the steps below to find the problem and get your tool working again.
What Does the Red Light Mean?
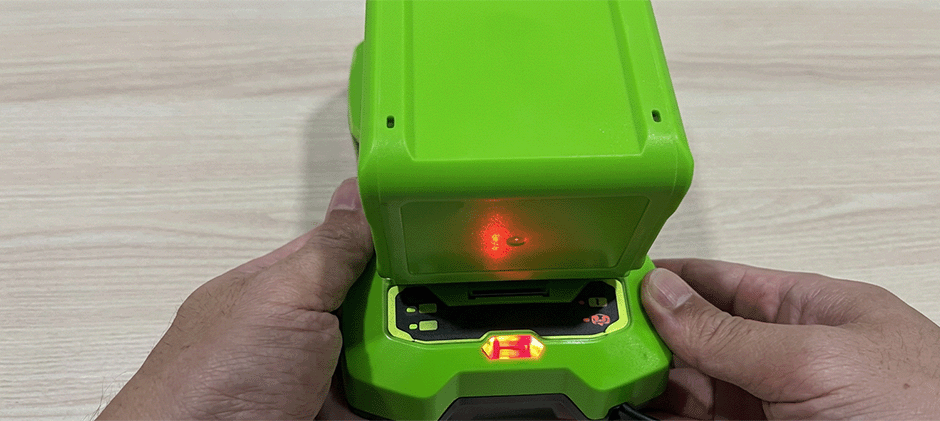
That red light isn’t just some random error. It’s actually a diagnostic signal. Start by watching what your charger does. Greenworks chargers use two different red light patterns to tell you what’s wrong.
- Solid Red Light: This almost always means a temperature problem. The battery pack is either too hot after heavy use, or too cold from sitting in a chilly garage. The system blocks charging for safety. This is a built-in protection feature.
- Flashing Red Light: This means a more serious fault. The charger found an issue and won’t start charging. It could be a battery that’s drained too low, bad cells inside the pack, or a connection problem between the battery and charger.
Knowing the difference helps you pick the right fix. If you see a solid red light, usually all you need to do is wait.
Common Reasons for a Flashing Red Light and Charging Failure
When your Greenworks battery won’t charge and you get a flashing red light, the charger is letting you know it found a problem. This isn’t just some random glitch. It points to one of these common issues.
Battery temperature out of range: Lithium batteries only work safely between 40°F and 104°F (4°C and 40°C). The built-in BMS keeps checking the temperature nonstop. If the battery gets too hot after heavy use, or too cold sitting in a shed overnight, the BMS stops charging to save the cells from permanent damage. A steady red light usually means temperature trouble, but some fault situations can also trigger a flashing red light for temperature issues.
Battery drained too low: This is the most common reason for flashing red. When the battery voltage falls below the safe cutoff point, the BMS puts the battery into a sleep mode to stop permanent damage. Once locked up like this, the charger can’t pick up a safe voltage and throws a fault. This usually happens when you run your tool all the way dead and leave it sitting, so the voltage keeps dropping even more.
Bad cells or unbalanced cells: A battery pack has many small cells inside. The BMS watches each cell’s health and voltage. If one group of cells has a much different voltage than the rest, or if a cell dies completely, the BMS flags a serious fault and blocks charging to avoid safety risks.
Dirty contacts or communication error: The battery and charger need to talk to each other to start charging. Dirt, rust or gunk on their metal terminals breaks that connection. A temporary electronic glitch in either unit can also mess up this link, and the charger will show a fault.
How to Fix a Greenworks Battery Not Charging?
A Greenworks battery flashing red means there’s a fault you need to check. Let’s go through possible causes, starting with the easiest fixes first.
Step 1: Try a Soft Reset
Sometimes the electronics inside the battery or charger get stuck in a fault. A quick power reset can clear the error and get charging working again.
- Method 1: Reset the charger. Unplug the charger from the wall. Leave it unplugged for at least one full minute so its internal capacitors fully drain. Plug it back in, then push the battery firmly onto the charger.
- Method 2: The repeated charge trick. This may work for batteries that are drained too low. Put the battery on the charger and wait until the red light starts flashing. Unplug the charger right away. Wait a few seconds, plug it back in and let it try charging again. Repeat this 5 to 10 times. This can add a small top-up charge to lift the battery voltage high enough for the charger to detect it, then normal charging can start.
Step 2: Check the Physical Connection
Don’t skip this simple check. A bad connection can stop the charger from reading your battery correctly. Look at the metal contacts on both the battery and charger. Are they clean? Check for dirt, grass cuttings or corrosion.
- Clean the contacts: Wipe them with a dry clean cloth. For tough grime, use a cotton swab with a little isopropyl alcohol. Make sure the contacts are totally dry before charging again.
- Test your power outlet: Plug the charger into another wall socket that you know works. This helps rule out a faulty outlet or tripped breaker.
Step 3: Address a Deep Discharge State
One of the top reasons for a flashing red light is a battery drained way too low. When the battery voltage drops under the minimum safe level, the BMS puts it into sleep or locked mode. This stops permanent damage to the cells, but the charger will see this locked state and throw a fault.
This usually happens when you run your tool all the way dead and leave it sitting for weeks. It can also happen with mowers that switch between two batteries automatically. Every time the mower restarts, it sips a little power from the first battery. After a few times, that battery gets drained too far.
Advanced Fix: The Jump Start Method
Disclaimer: This method has risks. You could cause a short circuit or ruin both batteries if you mess it up. Only try it if you know the dangers and feel confident.
Grab another good Greenworks battery with the same voltage to wake up the dead one.
- Get two short wires; 14-16 gauge works best.
- Find the positive (+) and negative (-) terminals on both batteries.
- Link positive on the good battery to positive on the dead battery.
- Link negative on the good battery to negative on the dead battery.
- Keep them connected for 5 to 15 minutes. This sends a small charge into the dead battery and lifts its voltage past the BMS cutoff point.
- Take the wires off right away and put the revived battery onto the charger. If it works, it should charge normally now.
Step 4: Isolate the Faulty Component
Work through these tests to find out if the battery or charger is causing the issue. Test with known working parts for reliable results.
- Grab another Greenworks battery and put it on this suspect charger. See if it charges normally. Confirm the charger works and your original battery is damaged if charging succeeds.
- Use a second working charger to test your problematic battery. Check if the battery starts charging. Pinpoint your original charger as the faulty part if charging works.
Find a neighbor with matching Greenworks tools for help if you lack spare batteries or chargers. Prepare to replace one worn-out component if testing is not possible.
Your Options: Warranty, Repair, or Replacement
Figure out whether your battery or charger is broken, then pick one of these solutions.
- Warranty: Check your purchase date for warranty coverage. Greenworks provides multi-year warranties for their tools, batteries and chargers. Reach out to their customer support if your item is still under warranty. Keep in mind certain habits like storing batteries in an unheated garage through winter can cancel your warranty.
- Repair: Skip DIY fixes for lithium-ion battery packs. These repairs are complicated and not safe for regular users. Fixing them means taking apart the pack and testing each cell’s voltage. You face big safety risks without the right skills and tools.
- Replacement: Choose replacement for items out of warranty. You have multiple choices when buying new parts. OEM batteries from the brand fit perfectly. Good aftermarket batteries and chargers deliver similar performance and reliability at a lower price.
Wrapping Up
A Greenworks battery flashing red can feel worrying, but it’s usually fixable. Most problems come from the wrong temperature or the battery being drained too low. Follow our troubleshooting steps first. If those tricks don’t work, grab reliable replacement parts. Shop with FridayParts: We carry a full range of compatible aftermarket parts for Greenworks lawn mowers to get your mower running again.
