
A squeak near the front of an off-road machine’s engine can stop a job fast—because the wrong “belt noise” can turn into downtime or major engine damage. This guide helps you track down timing belt squeaking, rule out look‑alike noises (like accessory drives), and decide what to fix first. You’ll get five common causes, practical repair steps, and maintenance habits that fit real off-road conditions: dust, mud, washdowns, long idle time, and heavy loads.
5 Common Causes of Timing Belt Squeaking
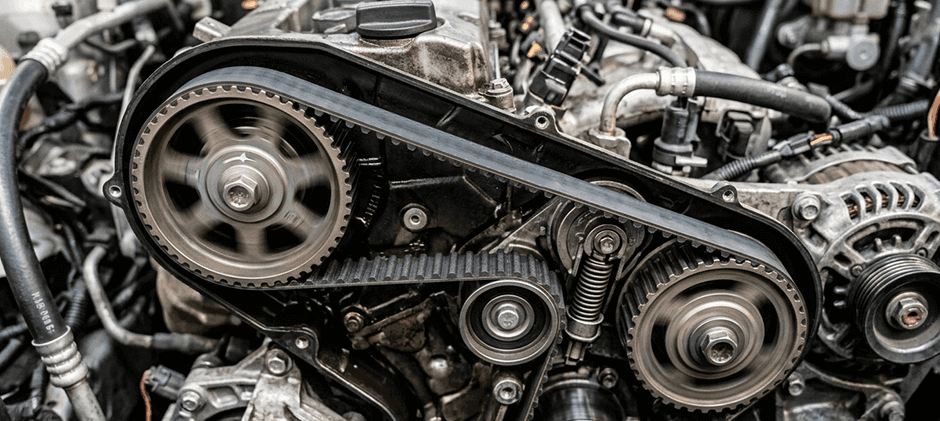
Before diving in, one important point: timing belts are toothed belts. Under normal conditions, they don’t make the same “slip squeal” you hear from a smooth accessory belt. So when people say “timing belt squeaking,” it often means noise from the timing belt system area—the belt, tensioner, idlers, water pump, or something rubbing inside the cover.
1) The noise isn’t the timing belt at all
On many off-road machines, the accessory drive runs the alternator, water pump, and other components. If that belt is cracked, glazed, mis-tensioned, or a pulley bearing is failing, it can squeal loudly—especially at startup, after washdown, or under load.
How it fools you: Accessory belt noise can echo off guards and covers and sound like it’s “inside” the timing case.
Clues it’s accessory-related:
- Squeak changes sharply when the electrical load increases (lights, fan, etc.).
- Noise is strongest at the front of the engine, but outside the timing cover.
- Quick changes with water mist or humidity.
If you suspect this, inspect the accessory drive and consider replacing worn components with compatible serpentine belts (built for flexibility and heat resistance, which matters on machines that work hot and dusty).
2) Incorrect belt tension
Improper tension is a top cause of timing-drive noise. It creates vibration and “belt resonance,” and it also overloads bearings.
- Too tight: adds stress to tensioner bearings, idlers, and water pump bearings. Noise may sound like a high-pitched squeak/whine and can come with heat buildup.
- Too loose: can cause tooth engagement noise, flutter, or, in severe cases, tooth jump/ratcheting (more likely under load changes).
Off-road factor: constant vibration and shock loads can make a marginal tension setup go out of spec sooner than expected.
What to look for:
- Tensioner indicator (if equipped) not in the correct window.
- Belt “twang”/flutter on the long span.
- Noise changes as RPM rises and falls, but not in a smooth linear way.
3) Worn or failing tensioner/idler pulley bearings
If a tensioner pivot dries out, a spring weakens, or an idler bearing starts to seize, the system can squeak, chirp, or whine. Many of these noises are bearing noises, not belt-tooth noises.
Why it matters: A rough idler can eat a good belt, and a failing tensioner can let the belt walk or lose proper tooth engagement.
Clues you’re dealing with a bearing:
- Squeak becomes a growl/rumble as it worsens.
- Noise continues even after a new belt was installed.
- Noise is localized to one pulley when listened to closely.
Practical tip: If the timing cover must come off anyway, many techs treat tensioners and idlers as “wear partners” and replace them with the belt, because labor is the expensive part.
4) Misalignment or belt tracking issues inside the timing drive
Timing components must run true. If pulleys aren’t aligned (parallel or angular misalignment) or a flange is damaged, the belt can track sideways and rub, causing squeaks and edge wear.
Common real-world causes of off-road machinery:
- A bent bracket after impact or improper lifting/support.
- A pulley is installed slightly cocked.
- Dirt trapped behind a pulley during assembly.
- Fasteners not torqued evenly.
Symptoms that point to misalignment:
- Belt edge fraying or shiny “polished” edges.
- Belt dust inside the cover.
- Squeak that comes and goes with RPM, plus visible tracking marks.
5) Contamination: oil, coolant, dust, or debris inside the timing cover
Timing belts rely on clean, dry running conditions. Contamination changes friction, softens belt material, and increases noise.
- Oil contamination: often from a front crank seal or cam seal leak. Oil can swell or weaken belt material and attract grit.
- Coolant contamination: can happen with water pump leaks (where the pump is driven by the timing belt) or nearby hoses/fittings.
- Dust and grit: off-road machines live in it. If seals or covers aren’t sealed well, fine dust can work its way in and act like sandpaper.
Clues:
- Wet belt, shiny/glazed surfaces, or swollen belt material.
- Dirty, paste-like buildup inside the cover.
- Squeak that gets worse after a washdown or after working in very dusty conditions.
How to Fix Timing Belt Squeaking?
Fixing timing belt squeaking is mostly about confirming the source and then correcting the mechanical cause. Use a simple decision path so you don’t replace the wrong parts.
Step 1: Confirm whether the noise is a timing drive or an accessory drive
Do this first because it can save hours.
- Listen with the covers on: note if squeak is sharp (often belt slip) or more like chirp/whine (often bearings).
- Check accessory belt condition: cracks, glazing, missing ribs, pulley wobble, tensioner bounce.
- If safe and allowed by the service procedure, run a short test with the accessory belt removed (only if the engine can be run briefly without driven accessories and you can prevent overheating/low voltage issues).
- If noise disappears, it’s not the timing belt system.
- If noise remains: proceed to timing drive inspection.
Safety note: Follow the machine’s service manual and site safety rules. Never bypass guards permanently.
Step 2: Inspect timing belt path, tension, and tracking
Once access is available:
- Verify the belt routing and that the belt sits correctly on every pulley.
- Check tensioner indicator alignment (if equipped).
- Look for belt edge wear, fraying, or unusual polish marks.
- Inspect pulley flanges and faces for scoring or burrs.
If tension is off, set it exactly to spec. “Feels tight” is not a spec, and over-tension is a common reason new parts fail early.
Step 3: Check tensioner and idlers like bearings, not like “simple pulleys”
With the belt off (or slackened per procedure):
- Spin each idler by hand: it should feel smooth and quiet.
- Wiggle for play: any looseness is a red flag.
- Check tensioner pivot action: it should move smoothly without sticking.
If anything feels rough, replace it. A “slightly gritty” bearing can become a seized bearing under heat and dust.
Step 4: Check for leaks and contamination sources
Don’t just wipe the belt and move on—find the source:
- Front crank/cam seal leak signs (oil trail, wet grime).
- Water pump seepage (coolant residue, staining).
- A cover gasket or missing fasteners are letting dust in.
If contamination happened, belt replacement is often the safer call, because contaminants can shorten belt life even if it looks “OK” today.
Step 5: Replace parts with correct-fit components
If the belt is worn, contaminated, the wrong size, or damaged during installation, replace it. A timing belt is a maintenance item with high consequences.
A good timing belt choice is one built for durability and precise fit, and FridayParts notes timing belts are a critical maintenance item because failure can lead to expensive internal engine damage—plus they offer a 1‑year warranty and 90‑day return policy.
Where to place the “marketing” decision: mid-to-late in the repair process is natural—after diagnosis confirms it’s time to replace, not before.
Quick “Fix vs. Replace” table
| What you find | Likely cause | Fix action |
|---|---|---|
| Squeak disappears when the accessory drive is isolated | Accessory belt/tensioner/pulleys | Replace the accessory belt, check the pulleys, and the tensioner |
| Belt edges frayed, or the belt tracks sideways | Misalignment / damaged flange | Correct alignment, replace damaged pulleys, replace the belt if edge wear exists |
| The belt is wet with oil | Seal leak | Fix leak + replace belt (often safest) |
| Idler/tensioner feels rough or has play | Bearing failure | Replace idler/tensioner (and usually belt) |
| Belt tension outside spec | Incorrect setup | Reset tension to spec; recheck after run-in if procedure calls for it |
Maintenance Tips for Timing Belt
Off-road schedules and conditions can be harder on belts than hour-meter intervals assume. Use the manual as the baseline, then tighten up checks based on the jobsite reality.
Routine habits that reduce squeaks and failures
- Follow the replacement interval (hours/time). A timing belt can look fine and still be near the end of its service life.
- Inspect after extreme events: overheating, coolant loss, mud packing, deep water crossings, or a front-end impact.
- Avoid pressure washing directly at covers and seals. High-pressure spray can push water and grit past sealing points.
- Keep guards and covers intact. Missing fasteners can let dust into the timing area.
- Don’t reuse questionable tensioners/idlers when the belt is replaced—labor is high, and rework is costly.
- Record parts and dates/hours. A simple log prevents “unknown age” belts from staying in service too long.
A simple inspection checklist
- Accessory belt condition (cracks, glazing, tensioner bounce)
- Any new oil or coolant residue near the front cover
- Unusual squeak/chirp at idle and during slow RPM changes
- Any belt dust near the cover seams
- Cooling performance (overheating can accelerate belt and bearing wear)
Conclusion
Timing belt squeaking usually comes from tension, alignment, pulley bearings, or contamination—and sometimes the sound isn’t the timing belt system at all. Isolate accessory-drive noise first, then inspect tensioner/idlers, belt tracking, and leaks inside the timing cover. Fix the root cause, not just the symptom. When replacement is needed, correct-fit aftermarket belts and matched components help reduce repeat failures and keep off-road machines working instead of waiting on repairs.