
When an engine that’s supposed to pull hard all day suddenly idles rough, feels weak under load, and throws P0010 code, the fastest way back to reliable power is a clean, step-by-step check of the VVT (variable valve timing) control circuit—not guesswork. In this guide, we’ll explain what P0010 means, what usually causes it, what symptoms to expect, and how we diagnose it in a practical order, so we don’t waste time or replace parts that aren’t bad.
What is the P0010 Code?
P0010 is a generic OBD‑II diagnostic trouble code that points to a problem in the “A” Camshaft Position Actuator Circuit (Bank 1).
In plain terms, the engine computer (ECM/PCM) is commanding the camshaft timing control system to move—usually through an oil control valve (OCV) / VVT solenoid—but it detects an electrical fault in that control circuit. “Circuit” is the keyword: P0010 is primarily an electrical/control code, not a “timing is advanced/retarded” performance code.
Here’s what the labels usually mean:
- Bank 1: the side of the engine that contains cylinder #1 (inline engines only have Bank 1).
- “A” camshaft actuator: commonly the intake cam actuator/solenoid (exact naming can vary by engine).
- Actuator circuit: the wiring, connector pins, solenoid coil, and the ECM driver that controls it.
What Causes the P0010 Code?
You see P0010 root causes fall into three practical buckets: oil problems, electrical problems, and mechanical problems (less common for P0010 specifically, but still possible).
1) Oil-related problems (very common)
Even though P0010 is a circuit code, VVT systems are oil-driven. Dirty oil and sludge raise the odds of repeat faults and “sticky” VVT operation.
Common oil-related contributors:
- Engine oil sludge from missed oil changes
- Wrong oil viscosity (too thick for conditions or spec)
- Low oil level (VVT can’t respond consistently)
- Clogged screen/filter at the VVT solenoid (where equipped)
2) Electrical problems in the actuator circuit (most direct cause)
This is where P0010 is usually born:
- Open circuit in the solenoid power/ground/control wire
- Short to ground or short to power in the harness
- Loose, corroded, oil-soaked, or water-intruded connectors
- Damaged insulation from heat, vibration, or rubbing points
- Failed VVT solenoid coil (internal open/short)
3) Mechanical/control problems (possible, but confirm last)
If the circuit tests good, you look deeper:
- The cam phaser is sticking mechanically
- Oil pressure problems are affecting the control behavior
- Timing system wear (chain/belt/guides/tensioner) is causing cam timing errors
Note: Those issues more often trigger related codes like P0011/P0012, but you don’t rule them out if symptoms and data point there.
What are the Symptoms of the P0010 Code?
Symptoms vary by engine strategy, but these are the patterns you typically see when P0010 is active:
- Check Engine Light (MIL) on
- Rough idle or unstable idle speed
- Loss of power (often more noticeable under load or higher RPM)
- Poor throttle response / sluggish acceleration
- Reduced fuel economy
- Hard starts (in some setups), especially hot restarts
- In some cases, the engine feels “flat” because VVT is disabled or stuck at a default value
Quick reference table (cause → clue → what you check)
| Likely Cause | What You Often Notice | What You Check First |
|---|---|---|
| Dirty/incorrect oil, sludge | Rough idle + sluggish response, sometimes multiple VVT-related codes | Oil level/condition, correct spec/viscosity, solenoid screen |
| Harness/connector issue | Intermittent MIL, code returns quickly after clearing, bumps/vibration trigger | Connector pins, rub-through spots, wiggle test |
| VVT solenoid coil failure | Code sets consistently, circuit tests out of range | Coil resistance, power/ground, command test |
| ECM driver/control issue (rare) | Wiring/solenoid test good, but no control output | Verify command signal, back-probe safely, rule out harness first |
How to Diagnose P0010 Code?
This is the section where time is usually won or lost. We diagnose P0010 in a sequence that matches how the system actually fails in the field: confirm the complaint, check oil basics, then isolate whether the problem is the solenoid, wiring, or ECM control.
Step 1: Confirm the code and capture scan data
- Read P0010 with a scan tool.
- Record freeze-frame data (RPM, coolant temp, load, oil temp if available).
- Check for companion codes (misfire, oil pressure, cam/crank correlation, VVT performance codes).
Why this matters: if you also see cam/crank correlation codes, you keep timing/mechanical checks on the table. If it’s a “clean” P0010 by itself, you stay focused on the circuit and the solenoid.
Step 2: Check oil level and oil condition (don’t skip)
Before you touch wiring, you make sure the system has the right “hydraulic supply.”
- Verify oil level on level ground and correct procedure.
- Inspect oil condition (thick sludge, fuel dilution smell, metallic glitter).
- Confirm correct viscosity/spec for the engine and ambient temperature.
If the oil is overdue or visibly dirty, an oil change (and correct filter) is often part of the fix plan—even if the circuit is also damaged. It reduces repeat failures and prevents a new solenoid from sticking later.
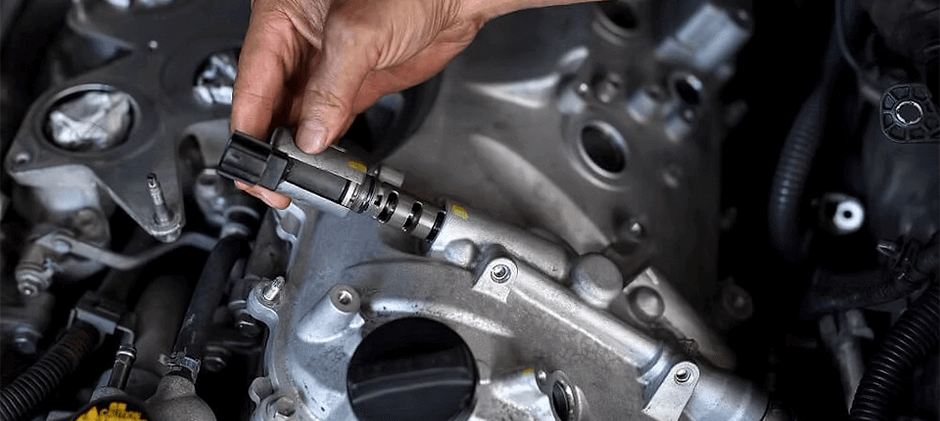
Step 3: Locate Bank 1 “A” actuator / VVT solenoid and do a tight visual inspection
You inspect:
- Connector fit (fully seated, lock intact)
- Pin condition (green corrosion, bent pins, pushed-out terminals)
- Oil inside the connector (a real cause of poor electrical contact)
- Harness routing (rub points near brackets, sharp edges, exhaust heat)
If you find obvious harness damage, we repair it correctly (sealed splices/heat shrink, proper routing, and retention) before clearing codes.
Step 4: Run an active test (if your scan tool supports it)
With the engine idling (or KOEO depending on the system), command the VVT solenoid on/off or vary the duty cycle.
You watch:
- VVT command (%)
- Cam actual vs. cam desired (if supported)
- Whether the code sets immediately when commanded
A code that sets the moment we command the solenoid strongly suggests an electrical circuit issue (open/short/coil).
Step 5: Electrical checks with a multimeter (core test for P0010)
Exact pinouts and expected values vary, so you always reference the correct wiring diagram. That said, these checks are universal in concept:
1. Check the power supply to the solenoid (where applicable)
- Key on: Do you have the expected feed voltage?
2. Check ground/control integrity
- Verify the ground path, or verify the ECM control wire isn’t open/shorted.
3. Measure solenoid coil resistance
- If resistance is out of spec (open circuit or very low), the solenoid is likely bad.
4. Continuity test from the solenoid connector back to the ECM connector
- Confirm no opens and no shorts to power/ground.
Tip: Intermittent faults are common. A wiggle test while watching resistance/continuity (or scan data) can reveal a break inside insulation.
Step 6: Decide: clean, repair wiring, or replace the solenoid
At this point, you should have proof. Typical decision logic:
- Oil is dirty/sludged, and the solenoid screen is clogged → clean/replace solenoid + oil/filter service
- Wiring damaged/corroded → repair/replace harness section/connectors
- Coil out of spec → replace VVT solenoid
- Everything tests good, but control is missing → verify ECM output (rare), check for TSB/software update if applicable
Step 7: Clear the code and verify under real-use conditions
A quick idle test isn’t enough. You verify with:
- Road test (or working-cycle test for your application)
- Re-scan for pending codes
- Confirm trims/idle stability and VVT response (if data available)
Closely Related Codes (helps you avoid misdiagnosis)
Sometimes P0010 appears with or is confused with these:
- P0011: cam timing over-advanced (Bank 1 “A”)
- P0012: cam timing over-retarded (Bank 1 “A”)
- P0020: “A” cam actuator circuit (Bank 2)
If you have P0010 + P0011/P0012, you take oil quality and mechanical sticking more seriously because the system is failing electrically, and the cam position isn’t tracking as expected.
Parts and repair planning (where downtime is decided)
Once we’ve proven the failure point, we usually recommend fixing the “root” and the “enabler” together:
- If the solenoid failed electrically, replace it, then confirm oil quality and correct viscosity.
- If the connector is compromised, replace/repair the connector with proper seals and strain relief.
- If sludge is present: oil service plus inspection/cleaning of the VVT solenoid screen (or replacement).
This is also the point where many owners choose to replace other worn electrical items preventively (depending on hours/mileage and access). For sourcing electrical and actuator-related components, it helps to browse a dedicated control systems category so you can match the right solenoids/modules and avoid delays when the machine or truck needs to return to work.
Later in the job, if you find that vibration, heat, or contamination took out more than one component, it’s often cheaper (and more reliable) to refresh related electrical hardware at the same time—again, keeping it centralized through a control systems parts selection can reduce the chance of mixing incompatible connectors or getting the wrong voltage rating.
Conclusion
P0010 points to an electrical problem in the Bank 1 “A” camshaft actuator (VVT) circuit, most often tied to the VVT solenoid, its wiring/connector, and sometimes oil-related contamination that makes the system unreliable. If we follow a data-first diagnosis—scan data, oil checks, visual inspection, then electrical testing—we can fix the real cause with fewer comebacks and less downtime.