
A lawn mower (including ride-on and off-road mowing equipment used on acreage, job sites, and rough ground) that won’t start, surges, or dies under load often points to one part: the lawn mower carburetor. The good news is that many carb issues come from dirt, varnish, or restricted airflow—and a careful cleaning can restore stable idle, smooth throttle response, and reliable power without guessing or replacing parts too soon.
Why Lawn Mower Carburetor Gets Dirty?
A carburetor is basically a set of small air and fuel passages (jets, tiny ports, and a bowl) that must stay clean to meter fuel correctly. Off-road use makes that harder because equipment runs in dust, vibration, and temperature swings.
Common real-world causes:
- Stale fuel after storage: Fuel can leave sticky deposits (varnish) that plug jets and idle circuits—especially after weeks or months sitting.
- Ethanol-related moisture: Fuel can absorb water. Water leads to corrosion and rough running, and it can create “phase separation” problems in storage.
- Dirty or leaking intake filtration: A torn seal, loose housing, or clogged filter lets grit in or restricts air, both of which upset the air-fuel mix.
- Sediment from the tank: Rust flakes, dust, or plastic debris can move downstream and lodge in small passages.
- Restricted fuel supply: A clogged fuel filter, collapsing fuel line, or weak pump (if equipped) can mimic “carb problems.”
- Vibration and heat cycles: Off-road vibration can loosen clamps and fasteners; heat bakes deposits harder over time.
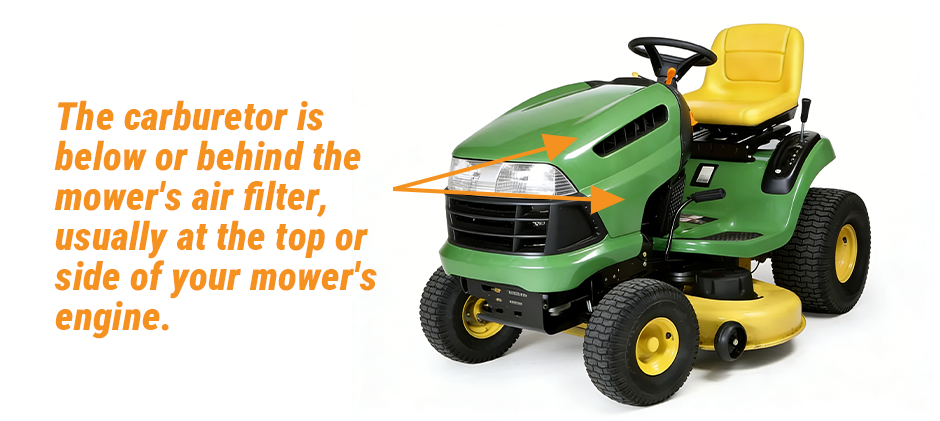 Where is the Carburetor on a Lawn Mower?
On most lawn mower engines (walk-behind, zero-turn, stand-on, or compact equipment with mower attachments), the carburetor sits:
- Right behind/under the air filter housing, bolted to the intake side of the engine
- Connected to:
- Throttle linkage (governor/throttle arm)
- Choke linkage (manual or automatic)
- Fuel line (from tank/filter/pump)
How to spot it fast:
- Find the air filter box (usually a plastic or metal housing).
- Remove the cover and filter element.
- The carburetor body is directly behind that housing—often with a float bowl on the bottom (a round metal cup held by a bolt).
Off-road note: On some machines, access is blocked by shrouds, guards, or intake ducting. Take photos as panels come off so reassembly is quick and correct.
Why You Need to Maintain a Lawn Mower?
On ride-on and off-road mowing equipment used on acreage, job sites, and rough ground, maintenance isn’t just about “keeping it clean”—it’s about preventing the exact failures that cause the most downtime: hard starts, surging idle, stalling under load, and sudden power loss. We see these problems traced back to simple issues like stale fuel varnish, ethanol moisture, restricted airflow, or sediment moving downstream into tiny fuel passages. Regular service keeps the air/fuel system stable, protects engine performance under heavy grass load, and reduces the chance that a small restriction turns into a no-start situation when you need the machine most.
Just as important, maintenance helps you catch wear early—before vibration and heat cycles loosen fasteners, create vacuum leaks, or accelerate deck and driveline wear. When you stay ahead of filters, belts, and basic checks, you get more consistent cut quality, smoother throttle response, and fewer repeat repairs caused by the same root problem (dirty fuel, dust ingestion, or neglected sealing surfaces).
Lawn Mower Maintenance Tips
If you want fewer carb-related headaches, build your routine around clean fuel + clean air + tight seals. Use fresh fuel (especially after storage), drain or stabilize fuel before long sit times, and keep the tank area clean so debris doesn’t get introduced during refueling. Replace the air filter when it’s dirty or oil-soaked, and make sure the air box gasket and housing seal properly—dust leaks on off-road equipment can throw off the air-fuel mix quickly. Also check for cracked intake boots, loose mounting bolts, and sticking choke plates, since vacuum leaks and choke issues often mimic “carb problems.”
For a practical checklist, we recommend:
- Before each use: quick visual for leaks, loose clamps/bolts, damaged fuel lines, and clogged intake.
- Weekly (or every heavy-duty interval): clean around the air box, inspect filter condition, check throttle/choke linkages move freely.
- Seasonal/storage: refresh fuel, replace fuel filter if flow is suspect, clean the carb throat first (no-removal), and step up to a bowl/jet clean if it only runs on choke or dies under load.
- After rough-terrain work: recheck fasteners and seals—vibration loosens things, and small air leaks can cause surging.
A carb clean is more successful when the rest of the system is kept clean—especially in dusty, off-road conditions.
Consider checking and refreshing these items during the same service window:
- Engine tune-up and fuel/ignition components that affect starting and stability
If the machine’s handling and operator control are part of the job-site uptime picture (common for commercial and off-road use), these categories also matter:
- Cutting system wear items (vibration can contribute to loosening and inconsistent load):
- Control components that affect safe operation over rough terrain:
And for fleet maintenance and fast part matching across machines:
- Steering components for heavy equipment applications (important note: this is for heavy equipment steering-related parts)
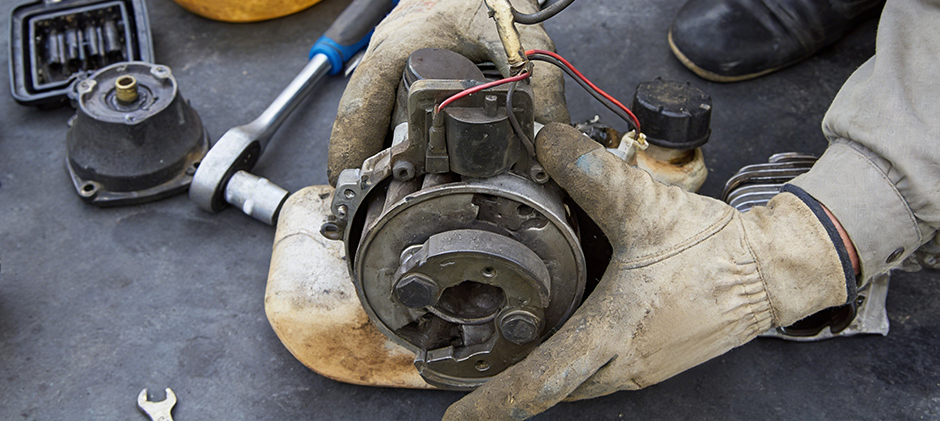
What If You Need to Remove the Carburetor to Clean It?
Removal cleaning is the “deep clean.” It targets the parts that usually cause hard-start and stall complaints: the float bowl, main jet, idle jet, emulsion tube, needle/seat, and tiny idle ports.
When to remove
Remove the lawn mower carburetor if you see:
- Fuel varnish smell and long storage history
- Rust-colored fuel or water droplets in the bowl
- No improvement after intake cleaning
- The bowl contains debris
- Jets are plugged (engine only runs on choke)
- Recurring problems because filters or tank contamination keep feeding debris
Removal cleaning: detailed procedure
1. Prepare and document
- Take photos of throttle/choke linkages from multiple angles.
- Label hoses if there are multiple lines (fuel, vent, pulse).
2. Drain or control fuel
- Close the shutoff valve (if present).
- Put a pan under the carb and remove the bowl drain screw (if equipped) or carefully loosen the bowl.
3. Remove intake and linkages
- Remove the air box and any breather hoses.
- Detach throttle and choke linkages gently (don’t bend rods).
- Disconnect the fuel line (expect some fuel spill).
4. Remove carb mounting bolts
- Pull the carb straight off the studs/bolts.
- Watch for gaskets/spacers—they must go back in the same order.
5. Disassemble on a clean surface
- Remove the bowl.
- Remove the main jet and emulsion tube (if the design allows).
- Remove the idle jet if accessible (some are behind a plug).
- Remove the float pin, float, and needle valve.
6. Clean correctly
- Spray carb cleaner through every jet and passage until the flow is clear.
- Use compressed air to blow passages dry (short bursts).
- Do not use steel wire to “drill” jets. That can enlarge the hole and cause permanent rich/lean issues. If you must probe, use a soft nylon bristle or a proper jet cleaning tool.
7. Inspect wear points
- Needle tip: grooves or hardening can cause flooding.
- Bowl gasket: Flattened or cracked gaskets cause leaks and air entry.
- Float: fuel inside the float (if hollow) means it’s bad.
- Corrosion pits inside the bowl can keep shedding debris.
8. Reassemble and reinstall
- Refit jets snugly (don’t over-torque).
- Confirm float moves freely and needle seats properly.
- Install new gaskets if they look questionable.
- Reinstall carb and linkages exactly as photographed.
- Open the fuel valve and check for leaks before starting.
9. Final run check
- Start and warm up.
- Confirm:
- Smooth idle
- Clean throttle response
- No hunting/surging
- No fuel seepage around bowl or line connections
Quick Diagnosis Table
| Symptom on off-road mowing equipment | Likely cause | Best next step |
|---|---|---|
| Starts, then dies unless the choke stays on | Idle circuit/jet clogged | Remove carb, clean jets + idle ports |
| Surges at idle, improves with slight choke | Vacuum leak or lean circuit | Check gaskets/intake boot, then carb clean |
| Strong fuel smell, wet plug, black smoke | Needle/seat leaking or float issue | Remove carb, inspect needle + float |
| Loses power under load, especially in dust | Restricted airflow or fuel flow | Replace air filter; check fuel filter and lines |
| Runs fine briefly after cleaning, then clogs again | Tank debris upstream | Clean tank/lines; replace filter(s) |
Conclusion
Cleaning a lawn mower carburetor is usually about restoring clean air, clean fuel, and clear passages—especially for off-road mowing equipment that lives in dust and vibration. Start with a no-removal clean, then step up to a full removal clean if jets or the float system are plugged. Replace filters and worn gaskets so the fix lasts. When parts are needed, quality aftermarket options can cut downtime without blowing the maintenance budget.