Have you ever encountered the circumstance where, after charging your forklift, pallet truck, or other apparatus, the machine still appears “powerless” or “incapable of ascending slopes”? The true culprit may not necessarily reside within your equipment or its battery, but rather within the charger itself. A malfunctioning battery charger may induce you to replace an expensive, heavy-duty battery unnecessarily, thereby squandering both time and resources. This guide shall bestow upon you a lucid, step-by-step procedure illustrating how to employ a mere multimeter to examine the charger, so as to accurately discern the issue and restore the equipment to its proper function.
How to Know if a Battery Charger is Bad?
The very first step of troubleshooting is to discern whether the issue resides within the battery or the charger. Certain rudimentary inspections oftentimes may reveal the proper course before one even lays a hand upon the tools.
Start with a visual inspection of the battery itself. On a heavy equipment battery, look for:
- Cracks or damage to the outer casing.
- Significant corrosion or buildup on the terminals.
- Swelling or bulging on the sides of the battery indicates internal failure.
The most effective way to ascertain this point is to conduct what is called a “swap test.” If you possess another device whose battery voltage is identical and is known to be in good condition, you may attempt to connect the suspected charger to that device. Should the good battery fail to commence charging (for instance, the indicator light remains unlit), it can be almost certainly concluded that the charger itself is at fault. Conversely, if you employ a known good charger to charge the original battery and it proceeds normally, it may then be determined that the issue lies with the original charger.
How to Test a Battery Charger?
If the primary indications manifest that the charger might be in a malfunction, the only way to ascertain the truth is to measure its voltage output. This procedure is of no excessive complication, and merely a single fundamental instrument is requisite — the digital multimeter. Herein are delineated six simple steps by which one may employ the multimeter to test the battery.
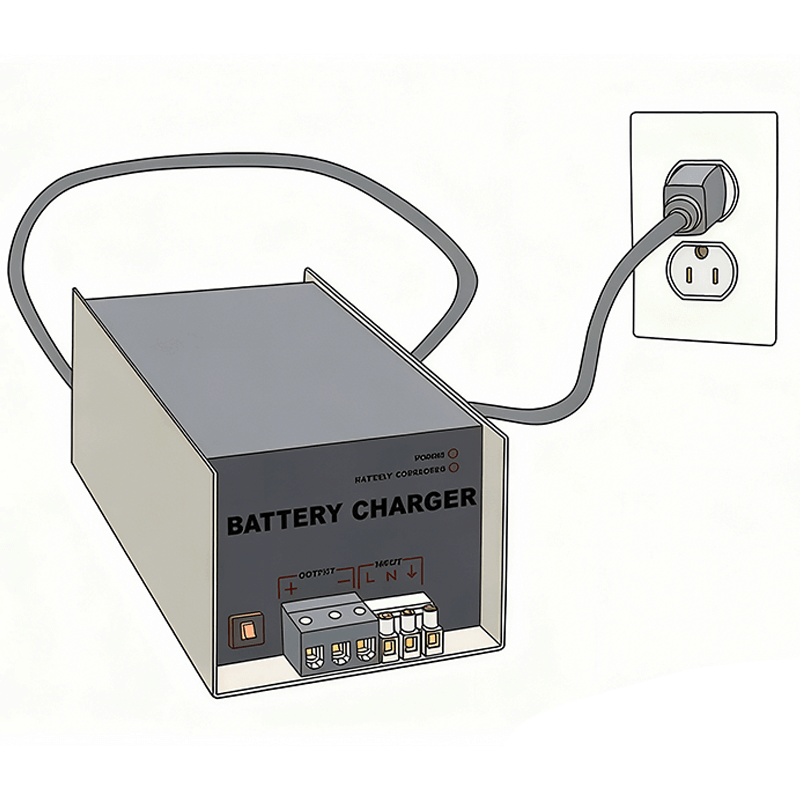
Step 1: Insert the Charger into the Power Socket
In order to examine the output of the charger, one must first ensure the existence of an input. Insert the charger’s power cord into an available wall receptacle. Should your charger be equipped with a principal power switch, turn it to the “ON” position. The power indicator light (if such a device exists) ought to illuminate accordingly.
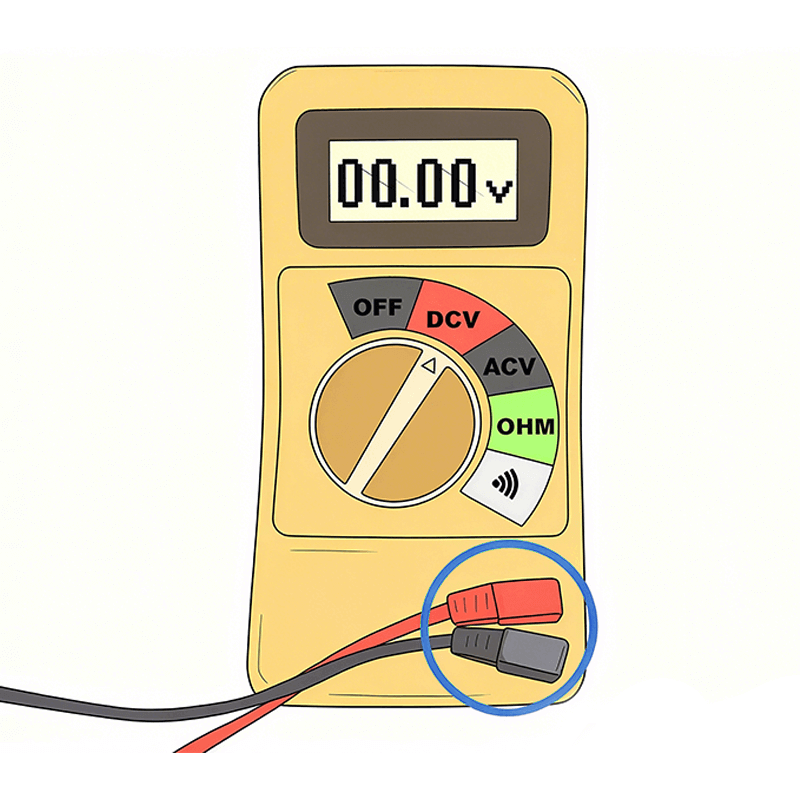
Step 2: Attach the Probes to the Multimeter
Your multimeter shall possess a red (positive) and a black (negative) testing probe. Insert the plug of the black probe into the port inscribed with “COM” (signifying the common or ground terminal). Thereafter, insert the plug of the red probe into the port designated “V,” “VΩmA,” or “VDC.”
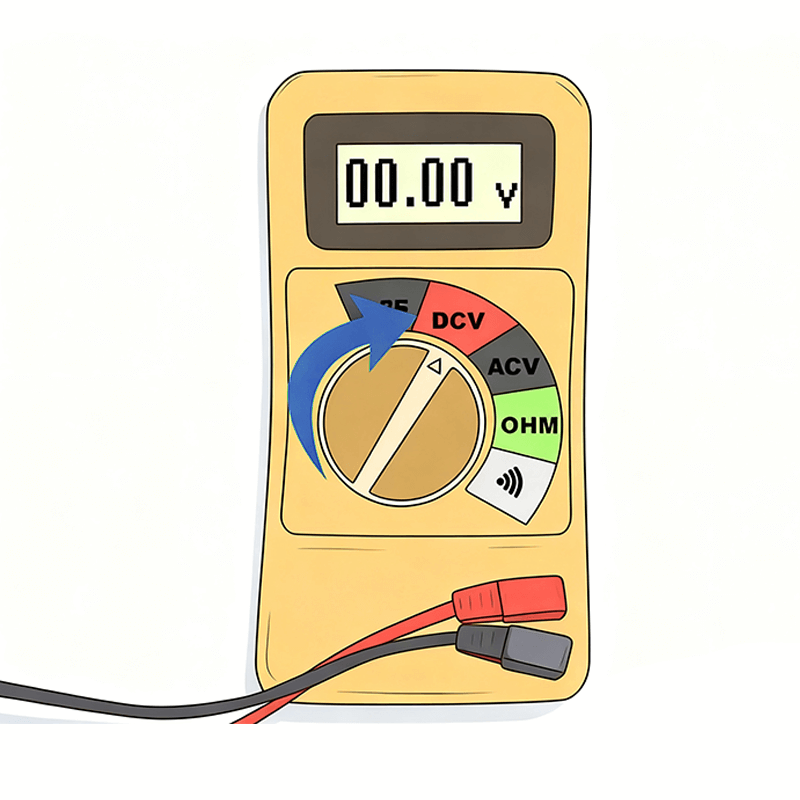
Step 3: Set the Multimeter to DC Voltage (DCV)
Rotate the grand dial of the multimeter toward the section of direct current voltage, which is oftentimes inscribed as DCV, V–, or the V symbol beneath which one straight line and three dots dwell. One must be prudent in selecting a voltage range exceeding the charger’s rated output. For instance, if thou art examining a 12V battery charger, then twist the dial to 20V. Shouldst thou be testing a 24V charger, perchance the 200V range shall be requisite. If one employs too meager a setting, grievous harm might befall the multimeter.
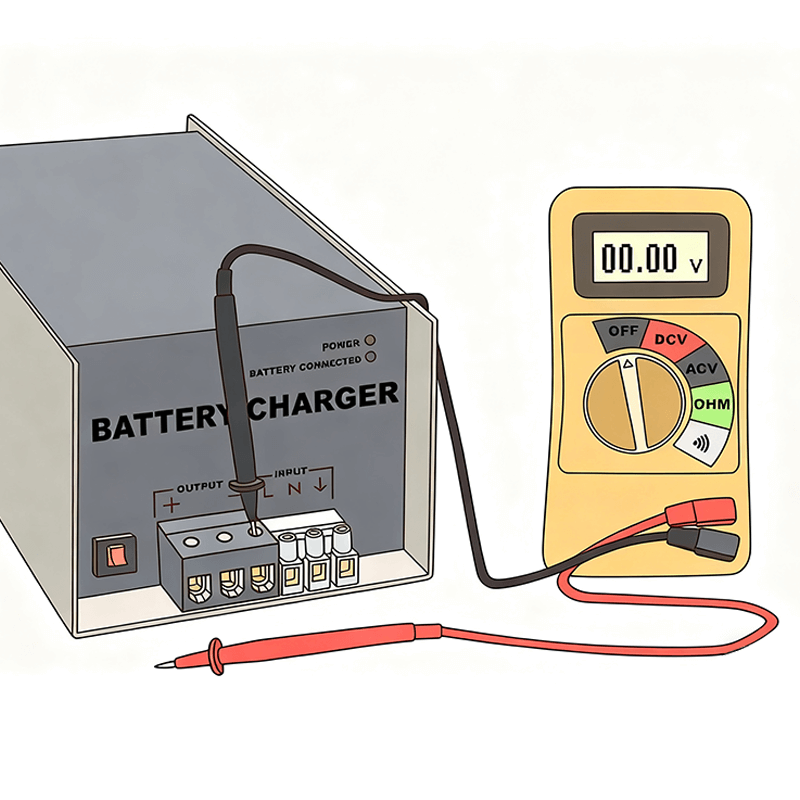
Step 4: Touch the Black Probe to the Negative Output
Press the metallic tip of the black (negative) probe with firmness upon the charger’s negative output terminal or clamp. The negative side is customarily adorned with the minus sign (-) and is, in most cases, of black hue.
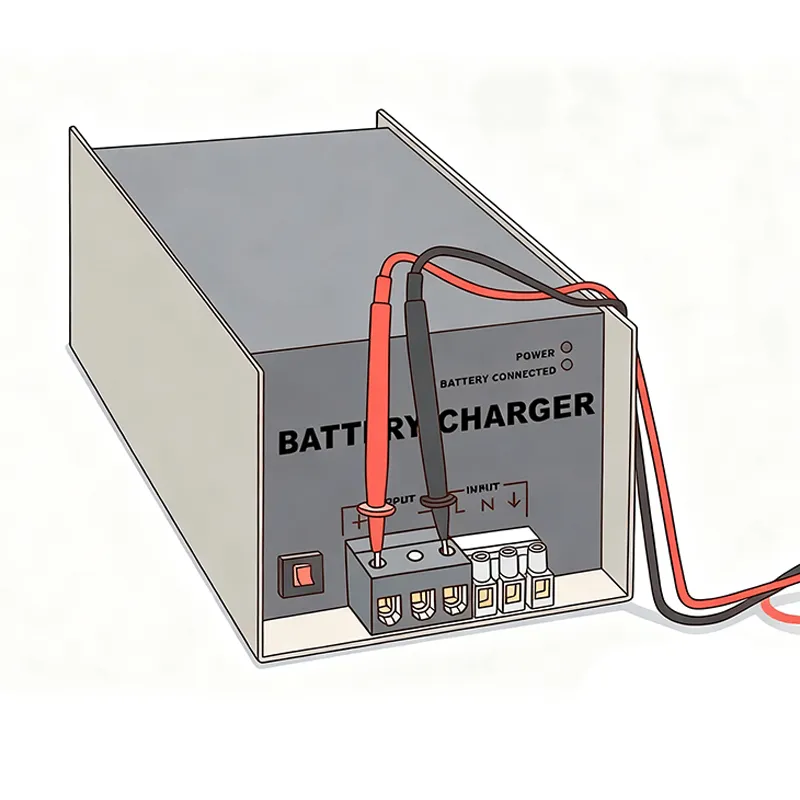
Step 5: Touch the Red Probe to the Positive Output
While holding the black probe in place, touch the metal tip of the red (positive) probe to the charger’s positive output terminal or clamp. This is marked with a plus sign (+) and is usually red. A faulty charger is a major source of downtime, and knowing when to replace it is key. If a test confirms the charger is dead, finding a reliable new battery charger is the next logical step. Ensure both probes are making solid contact with the metal of the terminals.
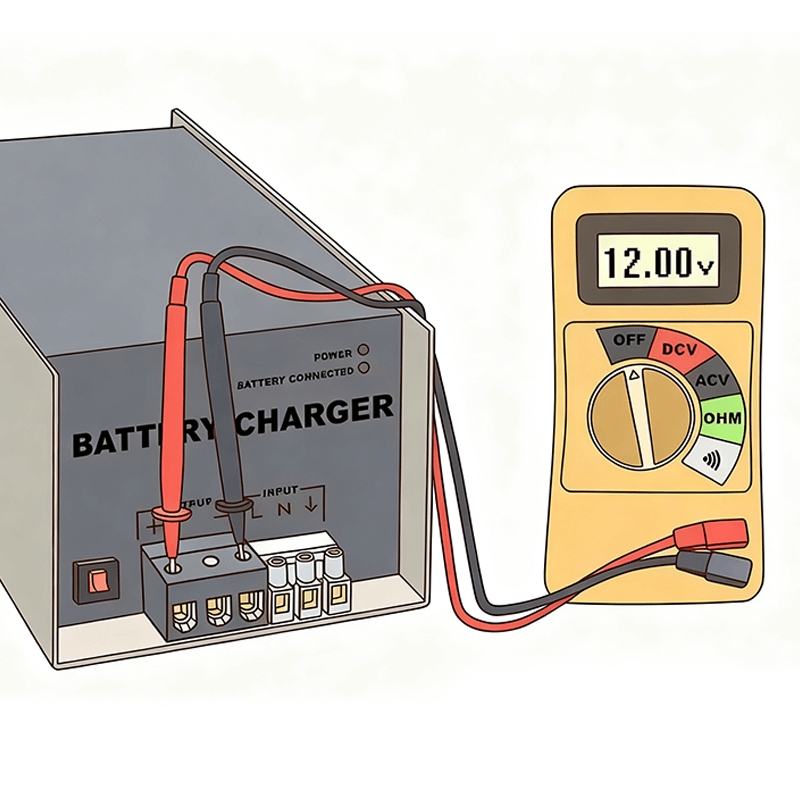
Step 6: Check the Reading on the Multimeter
Securely fasten both probes in their respective positions, and direct your attention to the digits manifested upon the multimeter’s display. This figure signifies the output voltage of the charger. A charger in normal working condition shall not exhibit its precise rated voltage; rather, it will demonstrate a slightly elevated value, intended to surmount the internal resistance inherent within the battery.
| Charger Rated Voltage | Expected Multimeter Reading (No Load) |
|---|---|
| 12V | 13.0V – 14.5V |
| 24V | 26.0V – 29.0V |
Should the multimeter reading indicate 0.00V or a value conspicuously below the anticipated range, it signifies that your charger is devoid of electrical output and is thus defective. Conversely, if the reading appears excessively elevated (for instance, surpassing 15V in the case of a 12V charger), this denotes a malfunction within the internal voltage regulator, whereby the charger may inflict damage upon the battery due to overcharging. In either circumstance, replacement of the charger becomes requisite.
Common Charger Failures and Solutions
When your inspection has verified that an issue indeed exists, it generally pertains to one of the subsequent circumstances.
1. Problem: The Charger Won’t Power On at All.
- Solution: Before pronouncing the charger as defunct, kindly scrutinize several elementary matters. Insert an alternative appliance to ascertain the wall socket’s proper operation. Examine whether the charger’s power cord exhibits any fractures or impairments. Certain large-scale commercial chargers are endowed with replaceable fuses; peruse the user manual to discern whether your charger is so equipped and proceed to inspection.
2. Problem: The charger delivers 0V or an abnormally diminished voltage.
- Solution: This indicates that internal constituents—such as the transformer or rectifier—have succumbed to malfunction. For the preponderance of modern chargers, this predicament lies beyond the province of user remedy. The most efficacious and secure recourse is to procure a replacement unit.
3. Problem: The Battery Doesn’t Seem to Charge Fully.
- Solution: Should voltage examination reveal the charger’s proper function, yet the battery remains obstinately uncharged to completion, the fault may reside within the charger’s current output or the battery itself. Primarily, ensure that the charger’s clips are immaculate and maintain a firm, corrosion-free engagement with the battery terminals. If the connection is found satisfactory, the battery may have aged to the extent that it can no longer retain a complete charge.
Don’t Let a Bad Charger Stop You!
Conducting a test on the battery charger is a swift and uncomplicated diagnostic procedure that may spare you from the expense and vexation of replacing a perfectly sound battery. FridayParts is your source for high-quality, affordable parts. Whether it’s a scissor lift, generator set, tractor-trailer boom lift, electric pallet truck, diesel generator, heavy-duty engine, vertical scissor lift, or more, we have battery chargers designed specifically for your equipment, saving you time searching online for parts!
