
At the heart of an excavator’s undercarriage lies the sprocket, a critical component that drives the tracks. A worn sprocket results in reduced traction, wasted power, and potentially catastrophic damage to the entire track chain. Ignoring a worn sprocket is a costly mistake. Yet, replacing a sprocket can seem like a daunting task. This guide will demystify sprocket replacement. We’ll provide clear, step-by-step instructions to help you safely and efficiently replace sprockets on heavy equipment, saving downtime and protecting your investment.
What are Sprockets on Heavy Equipment?
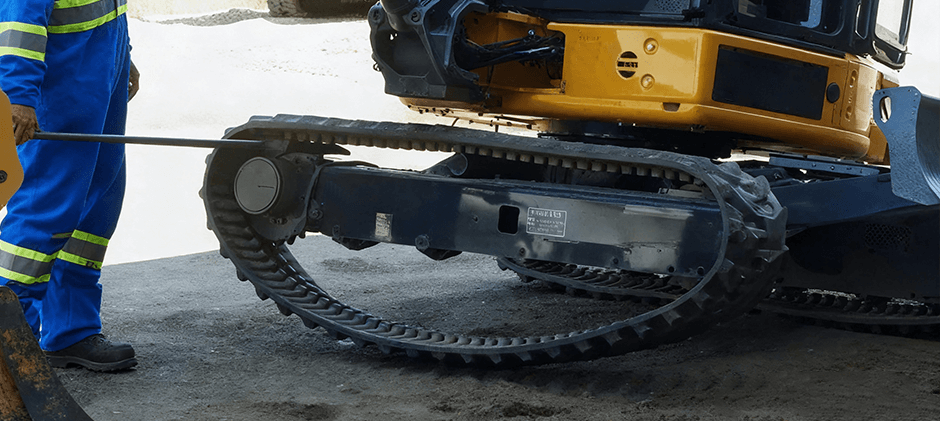
Think of the sprocket as the primary drive gear for your machine’s track system. Located at the rear of the undercarriage and connected to the final drive motor, the sprocket is a toothed steel wheel that engages with the bushings of the track chain. As the final drive motor turns the sprocket, its teeth grab the chain and pull it, propelling the multi-ton machine forward or backward.
It is easy to identify the health of a sprocket by looking at its teeth:
- New Sprockets: Have thick, robust teeth with a rounded or trapezoidal tip. This shape provides the maximum surface area to engage with the track bushings, distributing the load evenly.
- Worn Sprockets: As the track chain rotates thousands of times under immense load, the friction grinds away at the sprocket. The teeth become thin, sharp, and pointed, taking on a characteristic “shark-fin” appearance.
Once your sprockets reach this “shark-fin” stage, they must be replaced. Continuing to run on worn sprockets will rapidly destroy the bushings on your track chain, a much more expensive component to replace.
How to Replace The Sprockets On Heavy Equipment?
The replacement of sprockets is an undertaking entangled with heavy components and systems of elevated pressure. Safety is the supreme and unalterable priority. Only qualified personnel may perform this operation, and they must work on firm, level ground using proper tools. By no means shall one labor beneath a machine sustained merely by its own hydraulic contrivance.
Required Tools:
- Heavy-duty impact gun and sockets
- Large breaker bar
- Heavy-duty jacks, stands, or solid blocking
- Winch, come-along, or heavy-duty straps
- Hammers and pry bars
- High-pressure grease gun
- Wrenches and a putty knife for grease removal
Here is the step-by-step process for a successful sprocket replacement.
1: Preparation and Initial Loosening
Park the Machine: Position the machine on a flat, solid, and level surface like a concrete pad.
Loosen Accessible Bolts: While the track is still on the ground, use your impact gun or breaker bar to “break loose” all the sprocket mounting bolts that you can currently reach. Do not remove them completely yet. Due to the position of the track frame, you will likely only be able to access the bolts on the upper half of the sprocket.
2: Elevate the Machine and Release Track Tension
This phase of the process is the most critical, so you must handle it carefully.
- Elevate the Undercarriage: Place heavy-duty wooden or composite blocks on the ground just in front of the sprocket. Carefully drive the machine in reverse so the track climbs onto the blocks. This will lift the rear of the undercarriage off the ground, giving you clearance to work.
- Rotate the Track: Start the machine again and slowly rotate the track until the bolts you couldn’t reach before are now in the accessible upper position.
- Release Track Tension: The track is kept taut by a high-pressure, grease-filled adjuster cylinder. You must release this pressure to create slack. Locate the track adjuster valve on the track frame (it’s often a large bolt with a smaller grease fitting at its center).
- SAFETY WARNING: This grease is under extremely high pressure. Never stand directly in front of the valve.
- Slowly loosen the valve according to the manufacturer’s instructions. Grease will begin to escape. Continue to loosen it gradually until the grease stops flowing and the front idler has retracted, creating slack in the track. You may need to attach a come-along from the track frame to the track chain to help pull it back as you release the grease.
3: Lift the Track and Remove the Old Sprocket
- Lift the Track Chain: The track chain is of very heavy weight. Fix firmly the winch, hoist, or heavy-duty belt at the place near the sprocket of the track chain. You must tie the other end to a safe point on the upper structure of the machine, such as the ROPS (roll-over protective structure) or a certified lifting point.
- Create Clearance: Slowly turn the winch or belt to lift the track chain clear of the sprocket teeth. Leave enough space to slide out the old sprocket.
- Remove the Sprocket: After the track has been lifted, remove all installations that were loosened before. When removing the last bolt, you must prepare well, because the sprocket may shift or fall away. If rust or dirt causes the sprocket to stick to the hub of the final drive, you may need to strike it hard with a heavy hammer or pry it open with a crowbar.
4: Install the New Sprocket
- Clean the Hub: Thoroughly clean the installation surface of the final drive hub using a steel wire brush and a rag. A surface that is both clean and flat is of essential importance to the correctness of alignment as well as the torque.
- Position the New Sprocket: In this procedure, the actions of two people are often more convenient. With caution, let the new sprocket be slid onto the hub. One person may handle the movement of the sprocket, while another employs the pry bar to shake the track chain, so that the clearance is sufficient.
- Align and Start Bolts: Use a conical drift or pry bar to align the bolt holes accurately. At the beginning, tighten all bolts by hand to avoid misplacing the threads.
- The Initial Tightening: Using the impact gun, tighten the bolts that are reachable. Yet at this stage, the final torque shall not be applied.
5: Re-Tension the Track and Final Tightening
- Lower the Track: Carefully release tension and position the crawler chain onto the new sprocket.
- Re-Tension the Track: Use a high-pressure grease gun to pump fresh grease into the crawler adjusting valve. As you pump the grease, the idler wheel extends, tightening the crawler. Continue thus until the sag of the crawler attains the manufacturer’s ordained range (oft measured between the carrier roller and the idler). Consult the user’s manual to obtain the precise value of the measure.
- Final Torque: Kindle the machine and remove it from the block. Cause it to journey forth and back a few feet, so that the crawler may settle. Rotate the sprocket so you can reach the previously inaccessible bolts and fasten them tight. Finally, use the torque wrench to check and tighten all bolts, making sure you turn them according to the rightful OEM specifications.
Maintenance Tips and Best Practices
Replacing a sprocket is a big job. Following these best practices will ensure you get the most value out of your new parts and extend the life of your entire excavator undercarriage.
- Replace as a Set: Never install a new sprocket on a heavily worn track chain, or a new chain on a worn sprocket. The worn component will immediately begin to damage the new one. For best results, sprockets and track chains should be replaced together.
- Consider Turning Pins & Bushings: On some track chains, you can get a “second life” by having a qualified shop press out the pins and bushings and rotate them 180 degrees. This presents a fresh wear surface. This should be done before you install new sprockets.
- Regular Inspections are Key: A daily walk-around is your first line of defense. Visually inspect your sprocket teeth, and also check for wear on your track roller assemblies and idlers.
- Protect Your Investment: Ensure your chain guard is in good condition. This simple component helps guide the track and protects the rollers and sprocket from direct impact with rocks and debris.
- Quality Matters: The lifespan of your undercarriage is directly related to the quality of the steel. Always choose high-quality undercarriage parts that are properly forged and heat-treated to withstand the immense forces of heavy equipment operation.
Notice Your Undercarriage Now
Replacing the sprockets is one task of maintenance that can be regarded as manageable yet of the utmost importance, for it is safeguarding the well-being of the entire undercarriage system. In the midst of this laborious process, what FridayParts is capable of accomplishing is the provision of those original undercarriage parts of quality, which are difficult to obtain and purchase. It is in such a way that your burden in maintaining equipment shall be reduced, whilst at the same time our after-sales service of excellence shall dispel your worries thereafter. Moreover, our parts also bear compatibility with diverse brands, assisting you in minimizing downtime to the greatest degree and in sustaining the profitability of your operation.