
Hi everyone! If you are familiar with the FridayParts YouTube channel, you might know our two hosts, Caleb and Tristan. They are passionate about helping you maximize your tractor’s performance and lifespan. As the busy farming season is approaching, it is wise to replace your tractor oil filter before it is too late. In today’s video, we’re diving deep into a crucial maintenance task they covered: changing your tractor oil filter.
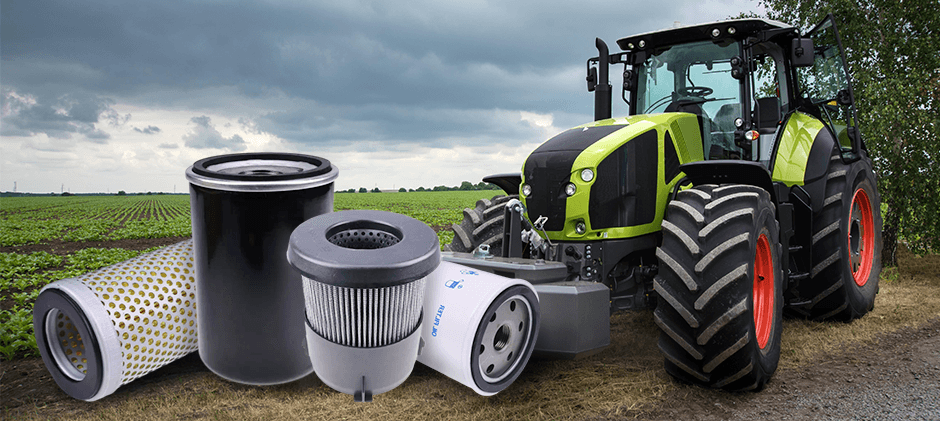
Your tractor is the workhorse of your farm or property, and its engine is its heart. Just like any heart, it needs clean “blood” to function optimally. In this case, that’s clean engine oil, and the component ensuring that cleanliness is the tractor oil filter. Neglecting this small but vital part can lead to significant engine problems down the road. In this guide, our two professional hosts will walk you through everything you need to know: why replacing your tractor oil filter is crucial, how to spot the signs of a failing filter, and a step-by-step process for replacing it yourself.
Why is Replacing Your Tractor Oil Filter So Important?
As Caleb and Tristan explain, think of the oil filter as the “kidney for your engine.” Your tractor’s engine oil circulates to lubricate critical moving parts, reduce friction, and help dissipate heat. Over time, this oil picks up all sorts of contaminants:
- Dirt and dust: Especially prevalent in farming and outdoor environments.
- Metal particles: Tiny shavings from normal engine wear.
- Combustion byproducts: Soot and other residues from the combustion process.
The tractor oil filter‘s job is to trap these harmful particles, preventing them from circulating and causing abrasive wear on bearings, cylinders, and other vital components. A clogged or inefficient filter can’t do its job properly, leading to:
- Increased Engine Wear: Dirty oil acts like liquid sandpaper, accelerating wear.
- Reduced Lubrication: A clogged filter can restrict oil flow, leading to lower oil pressure and insufficient lubrication for critical parts. This can cause overheating and significant damage.
- Decreased Performance: An engine struggling with dirty oil or poor lubrication won’t perform optimally.
- Shorter Engine Life: Ultimately, neglecting oil and filter changes will drastically shorten the lifespan of your tractor’s engine.
Signs of a Bad Tractor Oil Filter
While sticking to a maintenance schedule is best, sometimes a filter might fail prematurely or signal it’s time for a change. Look out for these warning signs:
- Low Oil Pressure Warning: This is a critical sign. A severely clogged filter can restrict oil flow, causing the pressure to drop and triggering the warning light or gauge reading.
- Noticeable Drop in Performance: If your tractor feels sluggish, struggles under load, or hesitates, poor lubrication due to a failing filter could be a contributing factor.
- Dirty or Gritty Engine Oil: When checking your dipstick, if the oil looks excessively dark, thick, or feels gritty shortly after an oil change, the filter might not be doing its job.
- Engine Sputtering or Metallic Noises: Lack of clean oil can cause internal components to grind or knock. While other issues can cause these noises, a failing filter shouldn’t be ruled out.
- Dirty Exhaust Smoke: Inefficient combustion, sometimes linked to poor engine health, exacerbated by bad filtration, can lead to darker or excessive exhaust.
If you notice any of these symptoms, inspect your oil and filter situation immediately.
When Should You Change Your Tractor Oil Filter?
So how often should you change your tractor oil filter? As highlighted in the video, the golden rule is to follow your tractor manufacturer’s recommendations, found in your owner’s manual. However, general guidelines exist:
- General Guideline for Tractors: Many manufacturers, and as Caleb mentions, recommend changing the oil and tractor oil filter every 100 hours of operation. Keep an eye on your tractor’s hour meter.
- Severe Conditions: If you’re operating your tractor in extremely dusty conditions, or under heavy load frequently (like extensive tilling or stop-and-go type work), you’ll want to change your filters more often. It’s always better to err on the side of caution.
- Annually: Even if you don’t reach the hour limit, it’s good practice to change the oil and filter at least once a year, especially before a busy season or before storing it for an extended period.
Here’s a general guideline table (Always prioritize your manual!):
| Usage Condition | Recommended Oil Filter Change Interval | Notes |
|---|---|---|
| Normal Use | With every oil change / per the Manual hours | Adhere strictly to the manufacturer’s schedule. |
| Heavy/Dusty Cond. | Potentially sooner than the manual schedule | Check oil condition frequently. |
| Infrequent Use | At least annually | Oil degrades, and condensation can occur. |
Tools and Materials You’ll Need
Before you start, gather the necessary tractor parts and tractor repair tools:
- New Tractor Oil Filter: Ensure it’s the correct part number for your specific tractor model. Check your manual or use a reliable cross-reference tool.
- New Engine Oil: The correct type and quantity as specified in your manual.
- Filter Wrench: Appropriate type (strap, cap, or plier) for your filter.
- Drain Pan: Large enough to hold the old oil.
- Socket Wrench Set: For the drain plug.
- Clean Rags or Paper Towels: For cleanup and handling parts.
- Funnel: For adding new oil.
- Gloves: To protect your hands from oil.
- Safety Glasses: To protect your eyes.
Step-by-Step Guide: How to Replace Your Tractor Oil Filter
Safety First: Ensure the tractor is parked on level ground, the engine is off, the parking brake is set, and the engine has cooled down slightly (warm oil drains better, but hot oil can cause burns).
- Prepare for the Tratcor: Park securely, engage the brake, and allow the engine to cool partially. Chock the wheels if necessary.
- Locate the Oil Drain Plug and Filter: Consult your manual if unsure. The filter is typically a cylindrical canister (often a spin-on filter) attached to the engine block. Place the drain pan under the drain plug.
- Drain the Old Engine Oil: Use the correct socket wrench to remove the drain plug, letting the old oil drain completely into the pan. Clean the drain plug and reinstall it, tightening to the manufacturer’s torque specification. * Pro Tip from the video (applied to truck, good for tractors too): Inspect the drain plug. If it has a magnet, check for excessive metal filings (a few fine particles are normal, large chunks are a concern). Check the condition of the crush washer or gasket and replace if worn or damaged.
- Position the Drain Pan Under the Filter: Move the drain pan beneath the old tractor oil filter. Your tractor might have a spin-on filter (looks like a can) or a cartridge filter (an element inside a permanent housing), or sometimes both (primary and secondary). The tractor in the video features a cartridge filter system, and it’s mentioned that it has two.
- Remove the Old Filter: Attach the filter wrench and turn the filter counterclockwise to loosen it. Oil will likely spill out. Once loose, finish unscrewing it by hand. Carefully lower the filter, keeping it upright initially to minimize spills, and place it in the drain pan.
For Cartridge Filters (as shown on the tractor):
* Locate the filter housing(s). Reposition your drain pan underneath if necessary, as some oil will spill.
* Using the appropriate wrench (a regular wrench was used for the housing bolt in the video), loosen and remove the housing bolt or cap (4:58).
* Carefully remove the housing. The old filter cartridge will be inside (5:01).
* Remove the old cartridge from the housing.
* Take out the old O-ring or gasket from the housing (5:18). Note its orientation.
* For Spin-On Filters:
* Position the drain pan beneath the filter.
* Using an oil filter wrench, turn the filter counterclockwise to loosen and remove it.
* Once removed, empty any remaining oil from the old filter into the drain pan.
* Ensure the old filter’s rubber gasket came off with the filter and isn’t stuck to the engine’s mounting surface. - Clean the Filter Mounting Surface: Use a clean rag to wipe the engine’s filter sealing surface. Ensure the old filter’s rubber gasket isn’t stuck to the engine – leaving it on will cause a major leak!
- Prepare the New Filter: Take your new tractor oil filter. Dip a clean finger into some new engine oil and lightly lubricate the rubber gasket on the top of the new filter. This helps it seal properly and makes removal easier next time.
- Install the New Filter: Carefully screw the new filter onto the mounting point by hand, turning it clockwise. Once the gasket makes contact with the sealing surface, tighten it further by hand – typically an additional 3/4 to one full turn (check your filter or manual for specific instructions – do not overtighten!). Using a wrench can damage the filter or gasket.
- Refill with New Engine Oil: Remove the oil fill cap. Using a funnel, pour in the correct amount and type of new engine oil as specified by your tractor’s manual. Replace the fill cap.
- Check for Leaks & Run Engine: Double-check that the drain plug and filter are secure. Start the engine and let it run for a minute or two while checking for leaks around the drain plug and the new filter base. The oil pressure light should go out.
- Check Oil Level & Dispose: Turn off the engine, wait a few minutes for the oil to settle, then check the dipstick. Add more oil if needed to reach the ‘Full’ mark. Properly dispose of the old oil and filter according to local regulations (many auto parts stores or recycling centers accept them).
Common Mistakes to Avoid During Replacement
- Using the Wrong Filter: Always verify the part number. An incorrect filter might not seal, filter properly, or have the correct bypass pressure.
- Forgetting to Lube the Gasket: A dry gasket can bind or tear, causing leaks.
- Leaving the Old Gasket On: Double-gasketing will cause a massive oil leak. Always check the mounting surface.
- Over-Tightening the Filter: This can damage the filter housing or gasket, making future removal difficult and potentially causing leaks. Hand-tight plus the specified turn is usually sufficient.
- Under-tightening the Filter: Can lead to vibrations loosening the filter and causing leaks.
- Spilling Oil: Work carefully and use an appropriately sized drain pan. Clean up spills immediately.
Conclusion
I believe that after finishing reading the blog, you have a full understanding of tractor oil filter replacement. Changing your tractor oil filter is a fundamental maintenance task that directly impacts your engine’s health and longevity. By recognizing the signs of a failing filter and following the correct replacement procedure outlined above, you can prevent costly damage and keep your tractor running smoothly. Remember to consult your owner’s manual for specific intervals and parts.
At Fridayparts, we understand how vital reliable tractor components are for your machinery. We offer a wide range of high-quality tractor oil filters. Protect your investment and ensure peak performance – browse our selection at Fridayparts today to find the perfect filter for your tractor!