
Over time, your lawn mower belt could wear out. When you notice some warning signs of lawn mower belt replacement, changing the mower parts is unavoidable. Replacing a lawn mower belt might seem daunting at first, but it is actually a manageable DIY task that can save your time and money. This guide will provide you with clear, step-by-step instructions for safely and effectively replacing your lawn mower belt, helping you get back to a perfectly manicured lawn.

Safety Comes First
Before you even think about touching your lawn mower belt, safety is paramount. Here is something you have to do to prevent potential injuries.
- Disconnect the Spark Plug: This is the most crucial step. Removing the spark plug wire (or unplugging the ignition key on electric models) ensures the engine cannot accidentally start while you’re working.
- Remove the Ignition Key (Riding Mowers): For riding mowers, always take out the key.
- Allow the Engine to Cool: Hot engine components can cause burns. Give your mower ample time to cool down.
- Wear Protective Gear: Gloves protect your hands from grease and sharp edges. Safety glasses shield your eyes from debris.
- Stabilize the Mower: If you need to tip the mower to access the belt, make sure it’s stable and won’t tip over. For riding mowers, set the parking brake and
Step-by-Step DIY Lawn Mower Belt Replacement
The exact changing steps could vary slightly depending on your mower’s make and model(eg., walk behind, riding mower, zero-turn), but the general process remains similar. We’ll outline a common procedure for both deck and drive belts.
Tools for the Job
However, the common first thing to do is to gather your tools beforehand saves you trips back and forth. Most lawn mower belt replacements require only a few basic items:
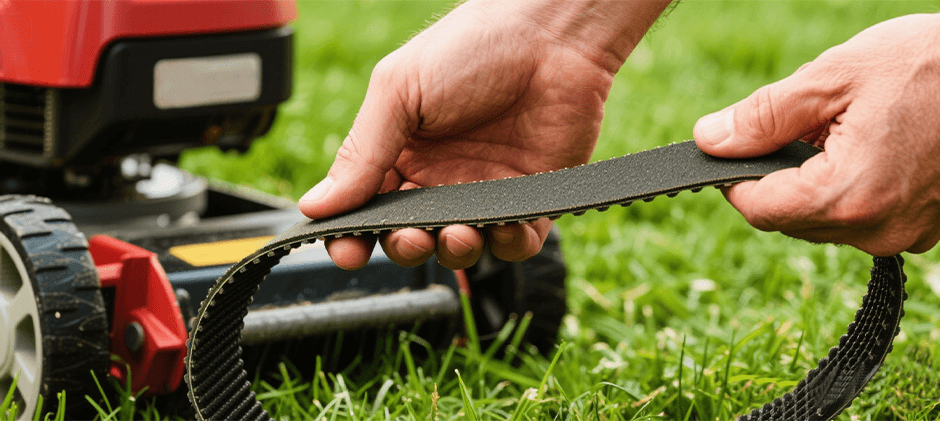
- New Lawn Mower Belt: Make sure you have the correct replacement lawn mower belt. This is critical for proper fit and performance. Refer to your mower’s owner’s manual for the exact part number or specifications (length, width, type).
- Socket Wrench Set: You’ll likely need various sizes to remove bolts for guards, pulleys, or tensioners.
- Pry Bar or Large Screwdriver: Useful for gently prying tension pulleys or guiding the belt.
- Pliers: For holding nuts or manipulating springs.
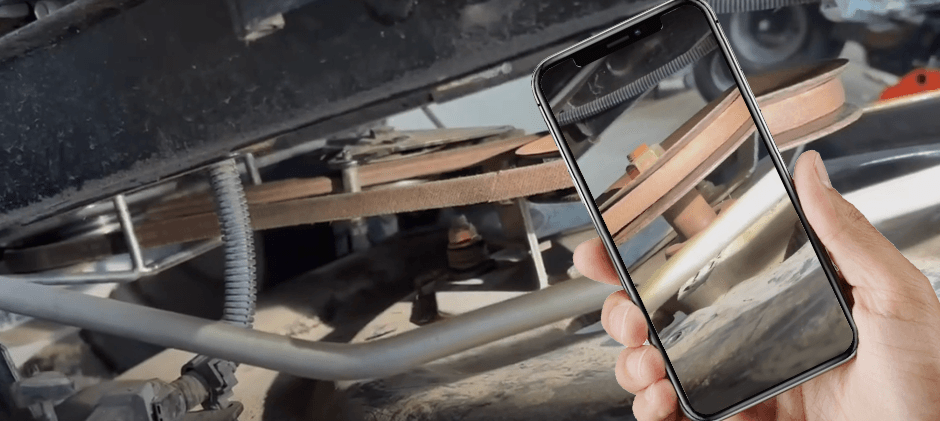
- Marker or Camera: To mark the belt’s path or take pictures before removal, especially if it’s a complex routing.
- Rag/Shop Towels: For cleaning and wiping grease.
- Degreaser (Optional): For cleaning pulleys if they are very greasy.
·Replacing a Deck Belt (Mower Deck Belt)
The deck belt powers the blades on your mower.
1. Remove the Mower Deck (Riding Mowers)
- Lower the cutting deck to its lowest position.
- Disconnect any lift arms or suspension rods that attach the deck to the mower frame.
- Unhook the PTO (Power Take-Off) cable or rod that engages the blades.
- Slide the deck out from under the mower. This usually involves removing a few pins.
2. Inspect the Old Belt Path
- Before removing the old mower belt, take photos or draw a diagram of how it’s routed around all the pulleys. This is crucial for correct installation of the new belt.
3. Relieve Belt Tension
- Locate the tension pulley or idler pulley. This pulley usually has a spring that keeps tension on the belt.
- Use a pry bar or screwdriver to push the tension pulley, loosening the belt. You may need to hold it in place while removing the belt.
4. Remove the Old Belt
- Carefully slip the old deck belt off the pulleys, starting with the easiest ones.
- Inspect pulleys for damage (e.g., worn bearings, bent flanges) and clean any debris.
5. Install the New Belt
- Following your diagram or photos, route the new lawn mower belt around the main drive pulley (connected to the engine via PTO) and all the spindle pulleys that turn the blades.
- The last pulley to route the belt onto should be the tension pulley. You’ll need to once again push the tension pulley to create slack for the final fit.
6. Check Belt Tension
- Once the belt is in place, release the tension pulley slowly. The belt should be snug. Manually spin the blades to ensure the belt moves freely without rubbing.
7. Reinstall Mower Deck (Riding Mowers)
- Slide the deck back under the mower.
- Reconnect all lift arms, suspension rods, and the PTO cable.
- Double-check all connections before operating.
·Replacing a Drive Belt (Transmission Belt)
The drive belt makes your mower move forward or backward. Accessing this belt often requires tipping the mower or removing panels.
1. Access the Drive Belt
- For walk-behind mowers, you might need to tip the mower onto its side (air filter up to prevent oil leaks).
- For riding mowers, you’ll usually need to remove a guard or panel underneath the mower to expose the transmission area. Some models require removing the seat or fender.
2. Document the Belt Path
- Just like with the deck belt, take pictures or draw a diagram of the drive belt’s routing around the engine pulley, transmission pulley, and any idler pulleys. This is often more complex than the deck belt.
3. Relieve Tension and Remove Old Belt
- Locate the tension spring or arm. Use a pry bar or appropriate tool to release the tension.
- Carefully unhook the old drive belt from the pulleys.
4. Inspect Pulleys and Components
- While the belt is off, inspect the pulleys for wear. Also, check the transmission and engine shafts for any signs of damage or excessive play. Clean any accumulated grass clippings or debris.
5. Install the New Belt
- Following your detailed diagram, meticulously route the new drive belt around all the pulleys. This step can be tricky and may require patience. Make sure the V-side of the belt sits correctly in the V-grooves of the pulleys.
6. Restore Tension and Check Alignment
- Once the belt is fully routed, release the tension mechanism. The belt should feel tight.
- Manually rotate the engine pulley (if possible) to ensure the belt tracks correctly and doesn’t rub against anything.
7. Reassemble Mower
- Replace any removed guards, panels, or the mower deck.
- Ensure all bolts are tightened securely.
Final Checks Before Starting
Before starting your mower, perform these crucial checks:
- Double-Check All Connections: Ensure all nuts, bolts, and pins are securely fastened.
- Verify Belt Routing: Confirm that the new lawn mower belt is correctly routed according to your diagram or the mower’s manual. Incorrect routing is a common cause of immediate failure.
- Reconnect Spark Plug Wire: Reattach the spark plug wire firmly.
- Clear the Area: Make sure no tools or debris are near the mower.
Start the mower in a safe, open area. Engage the blades or drive system slowly to ensure everything works as expected. Listen for any unusual noises and watch for proper operation.
Conclusion
Replacing a lawn mower belt might seem difficult, but with the detailed guide, the complex task is broken down into many simple tasks. Remember, using the correct lawn mower belt is key to proper fit and lasting performance. At Fridayparts, we pride ourselves on being a leading aftermarket parts supplier, offering high-quality lawn mower parts, including belts, at affordable prices. Our vast inventory ensures wide compatibility for many heavy equipment brands. When you need a durable, reliable replacement, choose Fridayparts – we have the parts you need to get your mower running smoothly again.