
A leaking hydraulic cylinder means downtime, while for working efficiency, keeping it in good condition is important. Fortunately, you don’t have to replace it entirely, but rebuild it with the tiny seal kits and components, which cost much less. This guide will tell you the pre-work for a full cylinder rebuild and a step-by-step guide to help you complete the job on your own with ease.
6 Pre-Work Tips to Rebuild Your Hydraulic Cylinder
1. Safety First
- Release system pressure completely
- Lock out the power source
- Prepare a drain pan for fluid
2. Clean Before Opening
- Power wash the cylinder exterior
- Keep workspace contamination-free
3. Thorough Inspection is Non-Negotiable
- Check the rod surface condition before and after disassembly.
- If hard parts like the rod, piston, or barrel are damaged, replace them—new seals won’t help.
4. Essential Tools
- Gland nut wrench
- Seal pick
- Seal installation tools
- Clean rags and hydraulic fluid
5. Proper Installation
- Lubricate seals before installing
- Use only soft installation tools
- Never force or twist seals
6. Test Systematically
- Start at low pressure
- Check for leaks
- Gradually increase to full pressure
Remember: Always prepare the right tools and follow these tips correctly, which will make your hydraulic cylinder rebuild easier.
8 Steps to Rebuild Your Hydraulic Cylinder
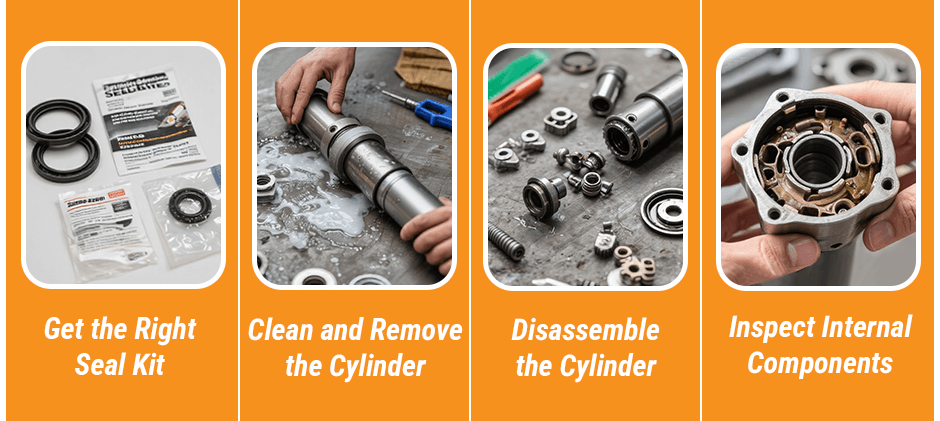
Step 1: Get the Right Rebuild Parts
Match the seal kit to your cylinder’s part number or your equipment’s model. Based on your initial inspection, also order any hard parts (like a new rod or piston) you anticipate needing. This ensures a perfect fit. If you’re unsure, FridayParts can help you find the exact hydraulic cylinder parts you need.
Step 2: Clean and Remove the Cylinder
With the exterior already clean, carefully remove the cylinder’s mounting pins. As soon as you disconnect the hydraulic lines, cap the hoses and cylinder ports immediately to prevent spills and contamination.
Step 3: Disassemble the Hydraulic Cylinder
Move the cylinder to your clean workspace. The method depends on the cylinder type:
- Threaded Gland: Use a gland nut wrench to unscrew the end cap.
- Wire Ring Type: Use retaining ring pliers to remove the wire rings first. Carefully pull the rod assembly out of the cylinder barrel, noting the order and orientation of all parts.
Step 4: Inspect Internal Components
This is a critical step in any rebuild. Check three key areas for damage:
- Rod: The chrome surface must be perfectly smooth. Any scratch you can feel with a fingernail, pitting, or bend means the rod must be replaced.
- Cylinder Bore: The inside of the barrel should be free of scratches or corrosion. Deep scoring requires honing or full replacement of the barrel.
- Gland & Piston: Ensure the grooves that hold the seals are not damaged or warped.
If you find any serious damage, the part must be replaced. A new seal kit cannot fix a damaged component.
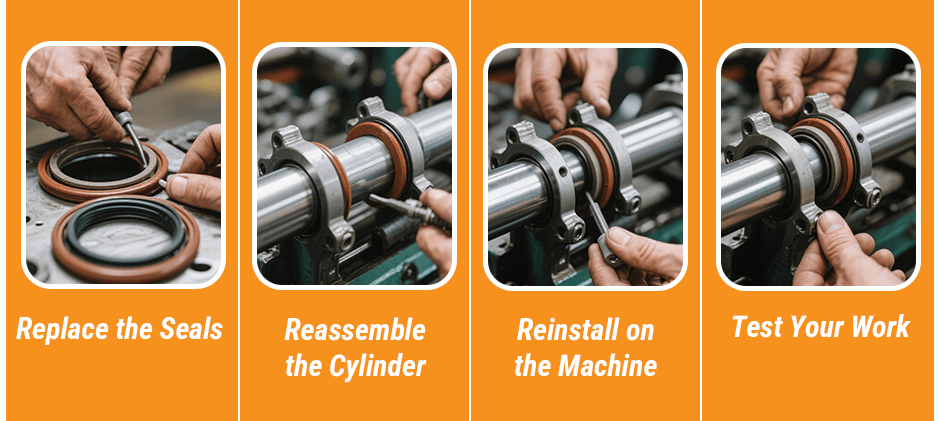
Step 5: Replace Seals and Worn Components
With all hard parts confirmed to be in good condition or replaced with new ones, remove the old seals from the piston and gland one at a time. Meticulously clean the grooves with a soft tool and a clean rag. Lubricate the new seals with fresh hydraulic fluid and carefully install them, making sure they are not twisted or nicked.
Step 6: Reassemble the Hydraulic Cylinder
Generously lubricate the inside of the cylinder barrel and the new seals. Carefully slide the rod assembly back into the barrel. Reassemble all other components in the reverse order of disassembly.
Step 7: Reinstall on the Machine
Mount the reassembled cylinder back onto your equipment. Reconnect the hydraulic lines securely.
Step 8: Test Your Work
The final step is to verify the repair.
- Purge Air: Start the machine and slowly cycle the cylinder back and forth several times with no load.
- Check for Leaks: Carefully inspect the gland area for any signs of leaking fluid.
- Apply Pressure: If there is no leaking situation, then we need to slowly give load, and again let the cylinder go one up one down, to prove that rebuilding has already become successful when under the working pressure.
Final Words
By following this guide, you can rebuild your hydraulic cylinder with ease. And when it comes to finding the right high-quality parts for the job, FridayParts has you covered. Whether you’re running a Bobcat loader, a John Deere backhoe, a JCB telehandler, or a CASE excavator, we stock a massive inventory of hydraulic cylinder seal kits and components designed for a perfect fit. From Komatsu dozers to Volvo loaders, our selection ensures you get the exact parts you need to complete your rebuild, stop the leak, and minimize downtime.
Shop our full range of hydraulic cylinders & Components today and get your equipment back on the job.